How to work with the online service:
We have developed an online service for 3Ds Max (V-Ray, Corona Renderer, Mental Ray) users to render their projects in automatic mode at any time without manager involvement.
It is still possible to render scenes created in other 3D software on Megarender through technical support.
10 steps to launch your project with Megarender
- Sign up
- Calculate cost of rendering
- Select a pricing plan
- Add to your balance
- Prepare and upload your scene
- Adjust scene settings
- Lite animation
- Software versions
- RAM size
- Start rendering!
Step 1. Sign up
Please sign up to the service by following the link.
Step 2. Calculate cost of rendering
Calculate the cost of rendering in our Calculator.
Step 3. Select a pricing plan
Choose between Light, Standard, Pro, and Business pricing plans. They can be selected in the user interface of the online service.
More details about the prices can be found here.
Important:
Light plan is ideal for rendering single tasks/scenes.
Standard allows rendering 3 tasks simultaneously.
Pro allows rendering 5 tasks simultaneously.
Business allows rendering 6 tasks simultaneously.
Step 4. Add to your balance
Add to your balance by any convenient method in the "Add to your balance" tab.
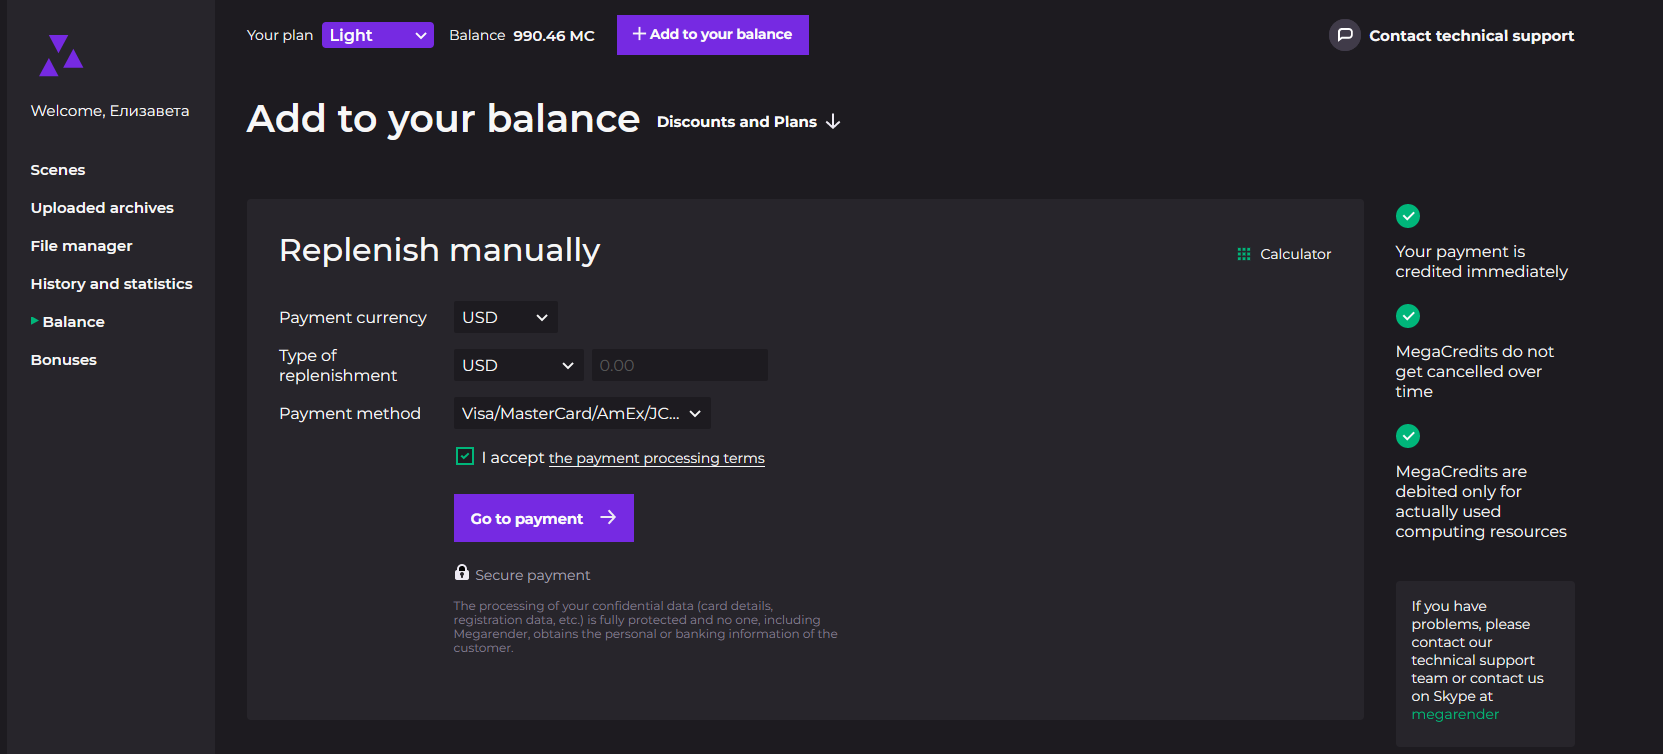
If you are using our service for the first time, you can get Welcome bonus by confirming your phone number in the dedicated tab of your account. It is perfect for testing our render farm.
Step 5. Prepare and upload your scene
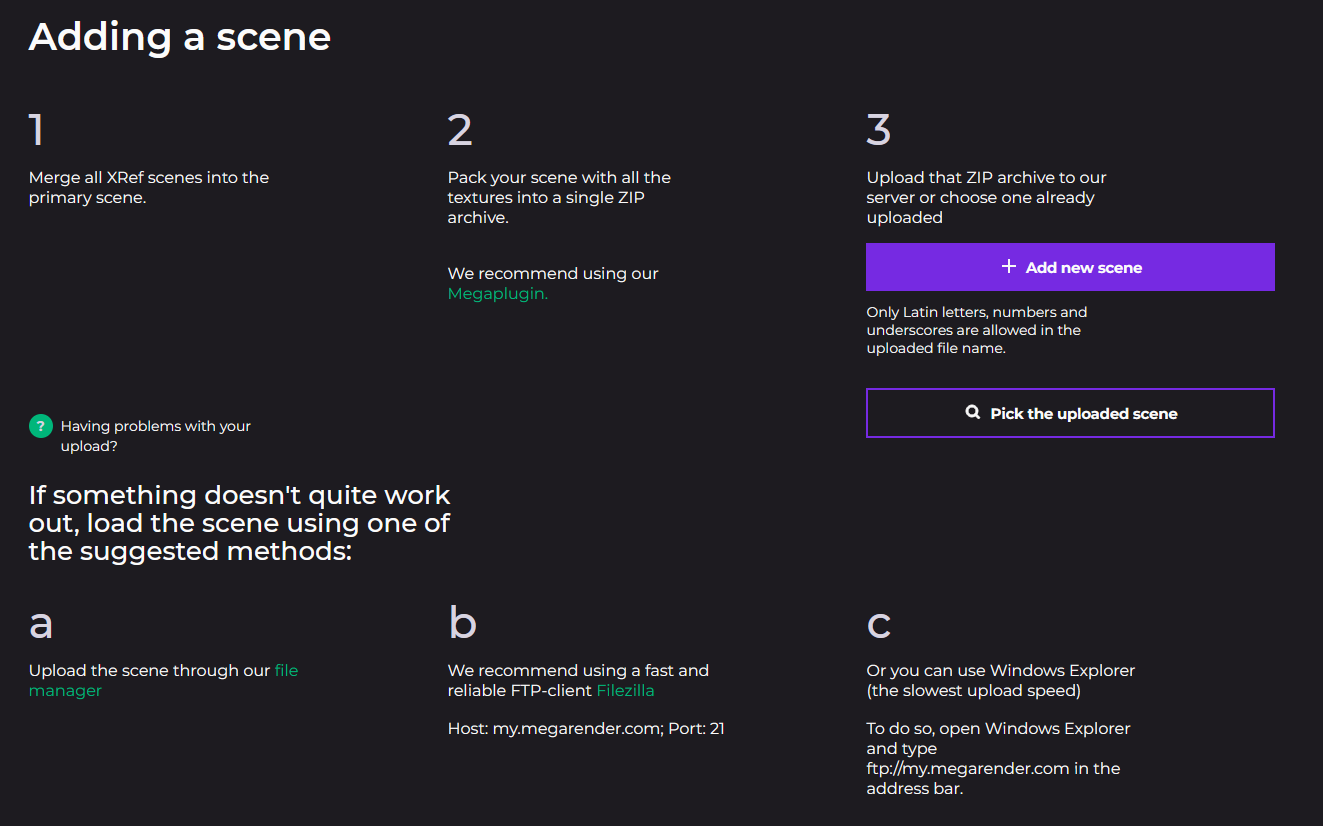
Pack your scene with the help of our plugin using the instructions.
If you have a Blender project, save all the assets inside a single blend file using File -> External Data -> Pack Resources, and put this file inside a ZIP archive.
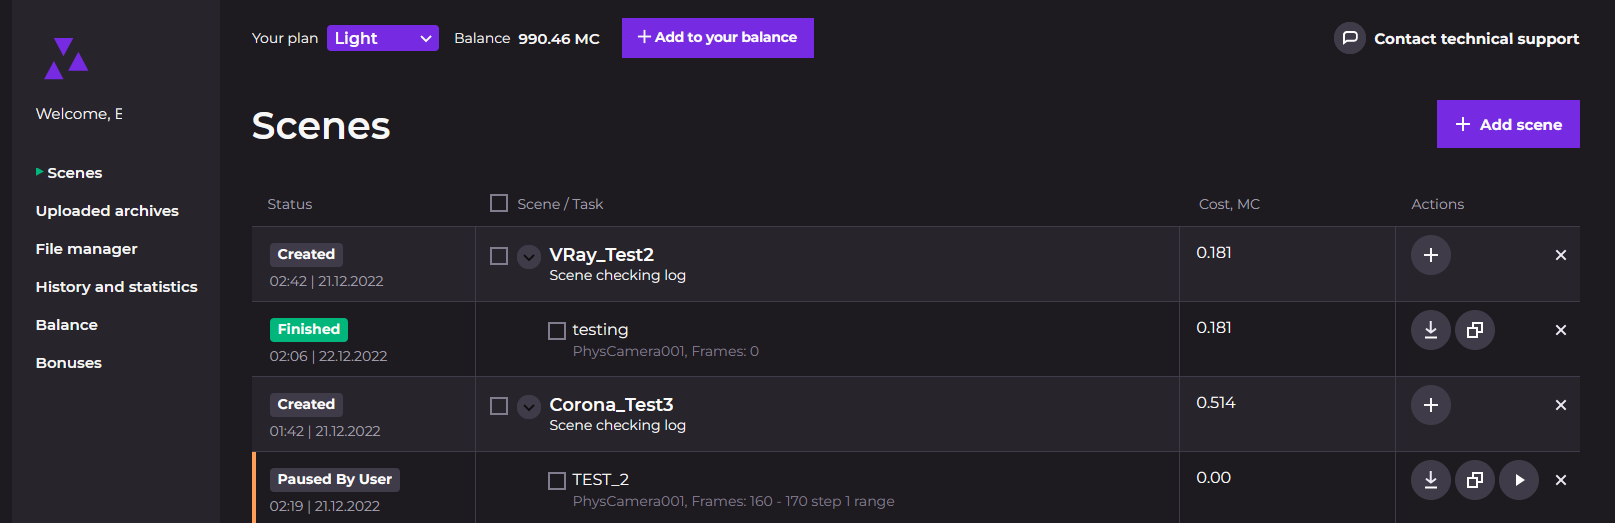
Upload your scene – click the "Add scene" button at the top of the page.
After clicking the button, you will be sent to the "Upload scene" page, where you will find a download link for our megaplugin. If you previously uploaded a scene, but did not send it for verification, select the already loaded scene and click "Next". If you are interested in additional ways to upload a scene, click the "Having problems with your upload?" link at the bottom of the page.
Step 6. Adjust scene settings
Now you can change any settings that were automatically read from your uploaded scene. Our interface matches 3DS MAX, and you will have no trouble changing any of them.
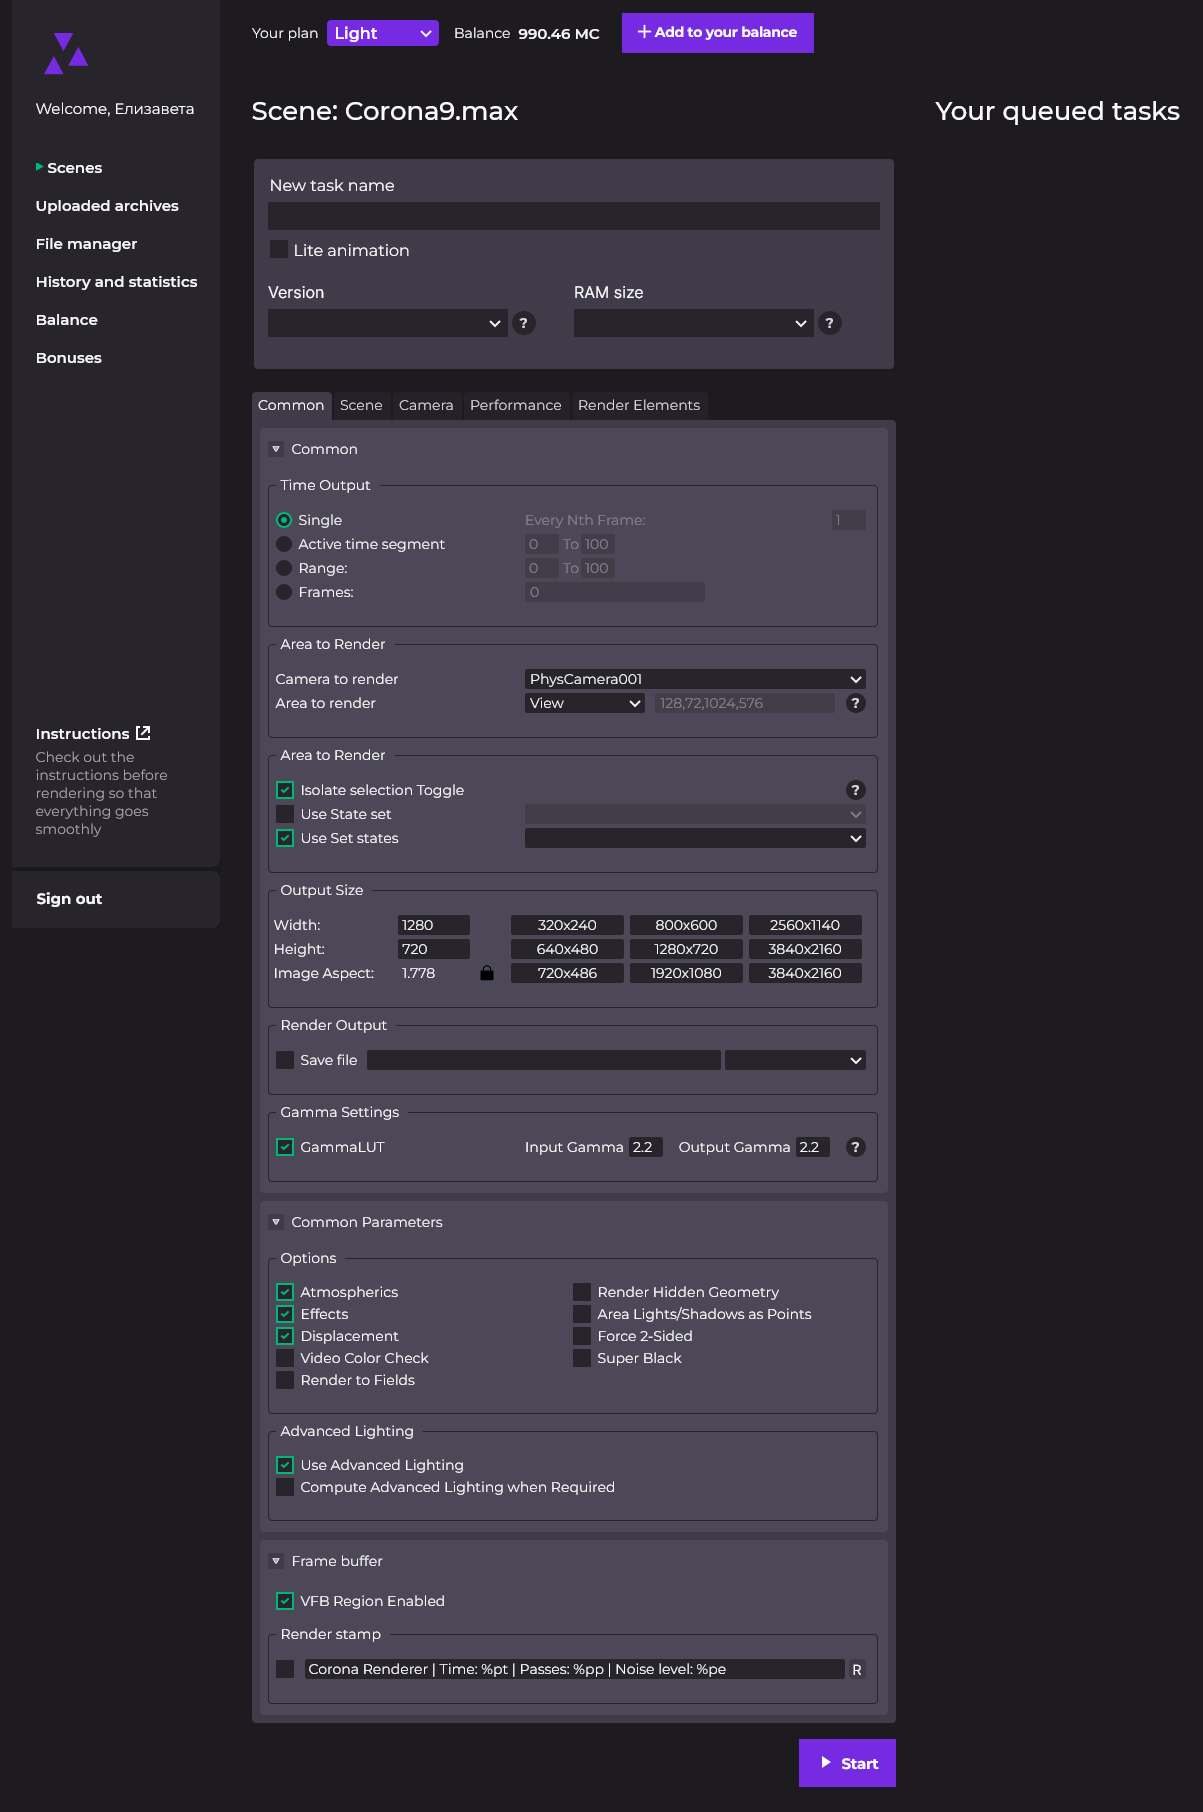
Lite animation
Choose this option if you have a simple project, in which every frame takes a short time to render. This way, the task will be assigned to several less powerful servers, which will reduce the overall rendering time and its total cost. If you have only one frame, rendering will take longer and there will be no effect on the total cost.
Software versions
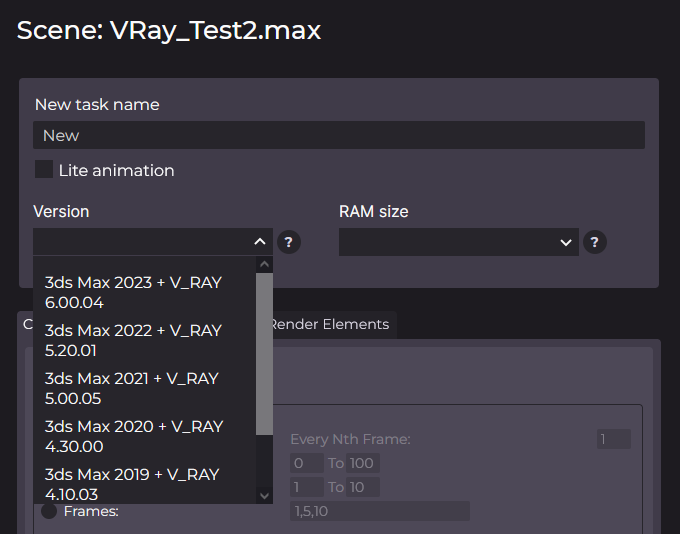
Choose the version of 3DS MAX and the rendering engine used to create your scene. If there is no exact match on the list, choose the version above yours.
Never choose a Corona or V-Ray version lower than the one you created your scene in!
If you are unsure which option to choose, contact our tech support, and they will gladly help you figure it out.
RAM size
Select the amount of RAM you need to render your scene. This will help us balance the farm load and reduce the waiting time.
Be aware that waiting time listed in the selection scroll is an approximation! Generally, the higher the RAM size is, the fewer computers we have with this RAM size, and the higher the chance is that they will be occupied. It is also not optimal to render smaller and less demanding scenes on the most powerful servers. If you are not sure which RAM size to choose – look it up in our FAQ.
Be careful with denoising. Many render engines (including Corona Renderer and V-Ray) use a single processor during denoising, and during distributed rendering all other CPUs will go on standby, but you will still be charged for renting them.
If you want to avoid this and save on denoising follow the instructions here.