How to sign up?
How to calculate the cost?
Which plan to choose?

The chosen plan defines the cost of your rendering and the number of tasks that can be rendered at the same time. You can create as many tasks as you need at any plan and they will fall into the queue. One task can only be rendered by one server. If you are rendering an animation, our service will offer to divide it into as many tasks as your plan allows.
On Light, tasks from the queue render 1 at a time. One hour of rendering costs 6.16 MC. If you have a small number of pictures or are ready to wait a little longer to save money, this plan is optimal for you.
On Standard, 3 tasks from the queue are rendered at the same time; an hour of rendering costs 7.1 MC. This is a balanced plan, suitable for animations and projects with multiple camera angles. Standard-plan tasks have priority over Light plan tasks in the queue.
On Pro, you can render 5 tasks in parallel; every hour of rendering costs 8 MC. This plan has priority over Standard.
On Business, 6 tasks launch at once from the queue. Each hour of rendering costs 9 MC. This is the plan with the most priority; during peak hours, your tasks will start rendering before any tasks made with lower plans.
The total cost of every single task depends only on the plan and not on the number of tasks being rendered concurrently. This means, rendering just one task on Pro will cost more than rendering just one task on Light. Switch plans before creating new tasks.
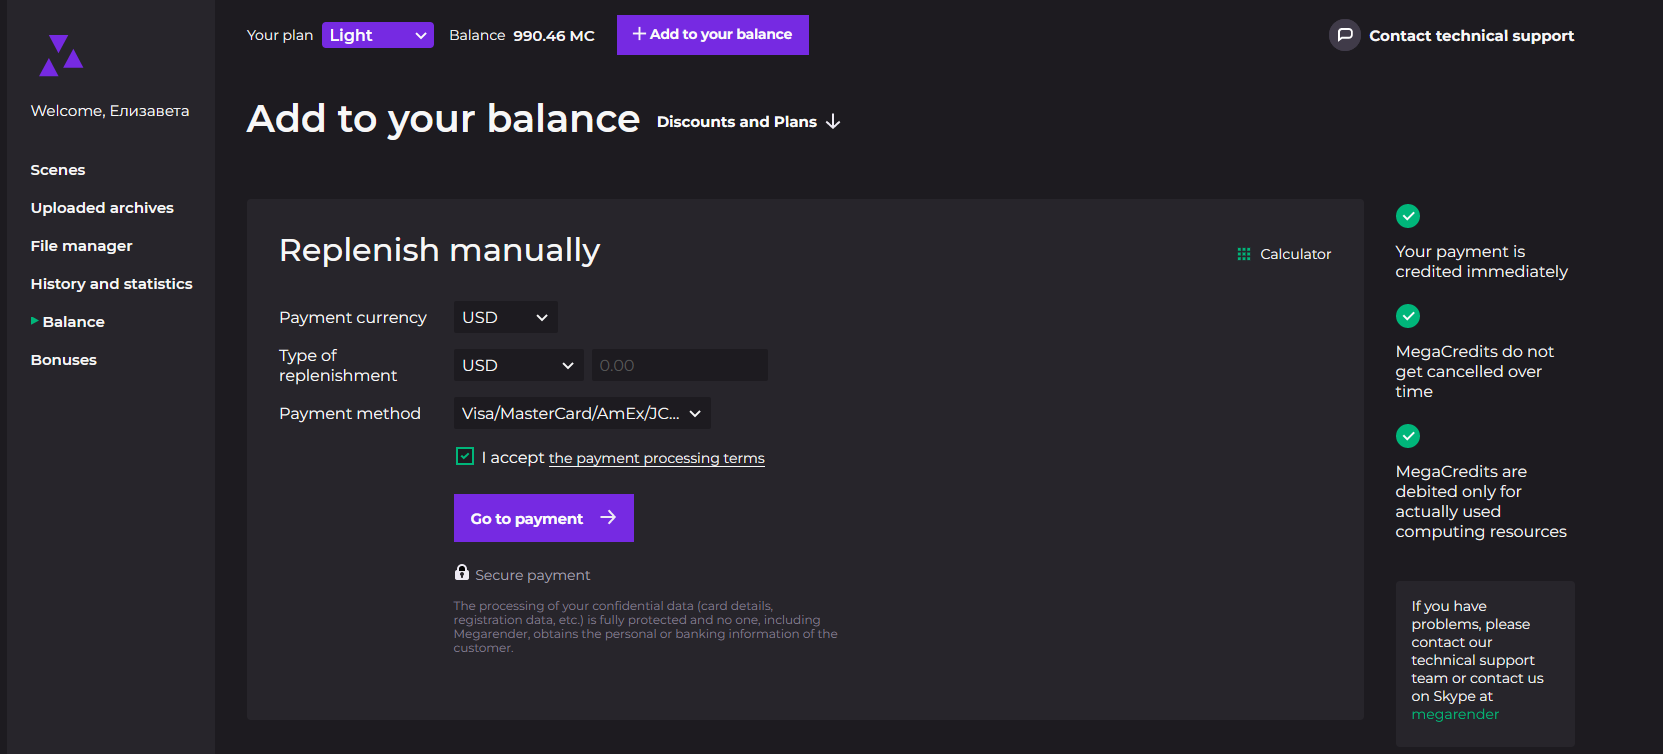
How to replenish my balance?
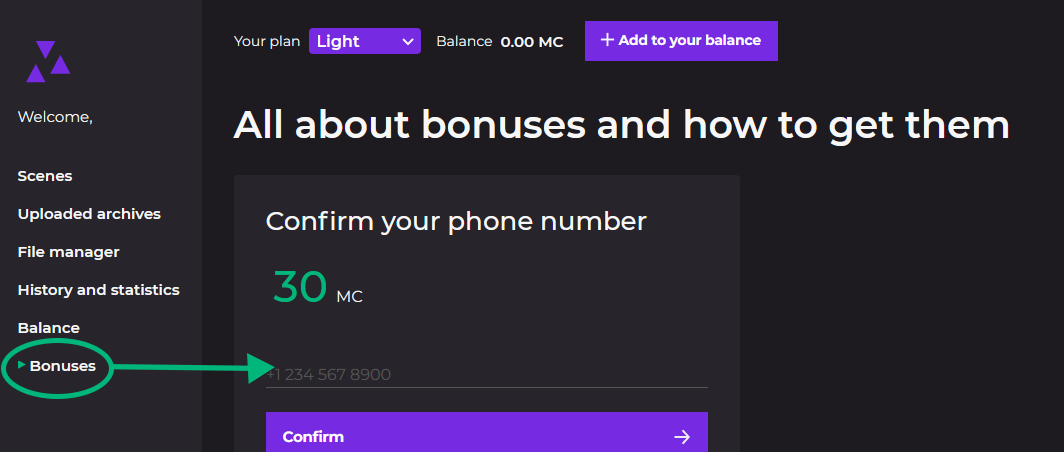
How to get my Welcome bonus?
If you are using our service for the first time, you can get Welcome bonus by confirming your phone number in the dedicated tab of your account. This bonus is perfect for testing our render farm.
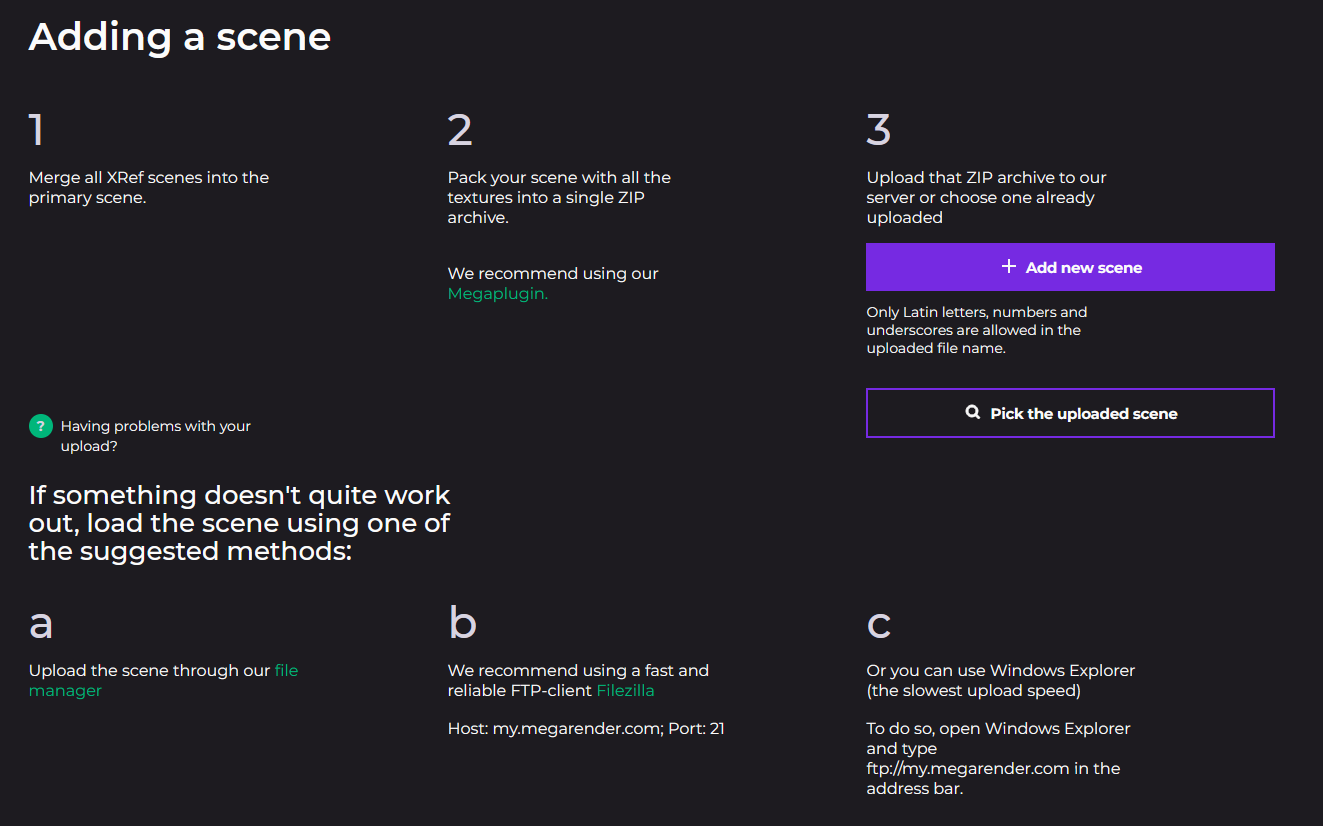
How to prepare the 3DS MAX scene for the render farm?
Pack your scene with our Megaplugin using the instructions.
If you are using XRefs, merge them before packing your scene. To do so open the XRef Scene tab, pick the necessary objects and press the Merge button. If you don't use XRefs, skip this step.


Upload your scene – click the "Add scene" button at the top of the page at the Scenes tab.
After clicking the button, you will be sent to the "Upload scene" page, where you will find a download link for our Megaplugin. If you previously uploaded a scene, but did not send it for verification, select the already loaded scene and click "Next". If you are interested in additional ways to upload a scene, click the "Read more" link at the bottom of the page.
How to prepare the Blender scene for the render farm?
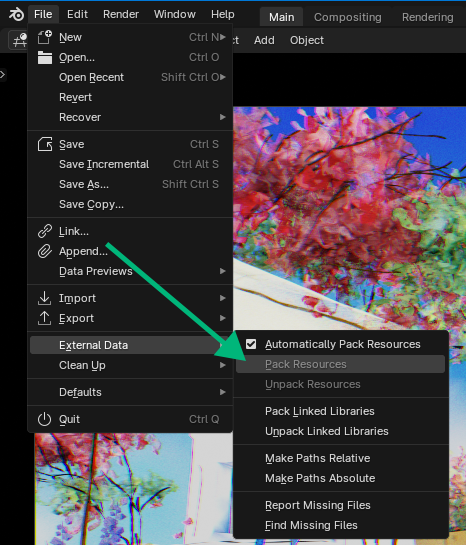
Save all the assets inside a single blend file using File -> External Data -> Pack Resources, and put this file inside a ZIP archive.
If you have caches that can't be packed inside the scene, put them in the same archive next to the .blend file.
NOTE: we only support rendering using EEVEE or Cycles. Before uploading your scene, make sure one of them is chosen in the render settings of your scene. Rendering in Workbench or a third-party rendering engine through the automatic service is impossible, but you can contact the tech support for manual rendering.
How to change my rendering settings?
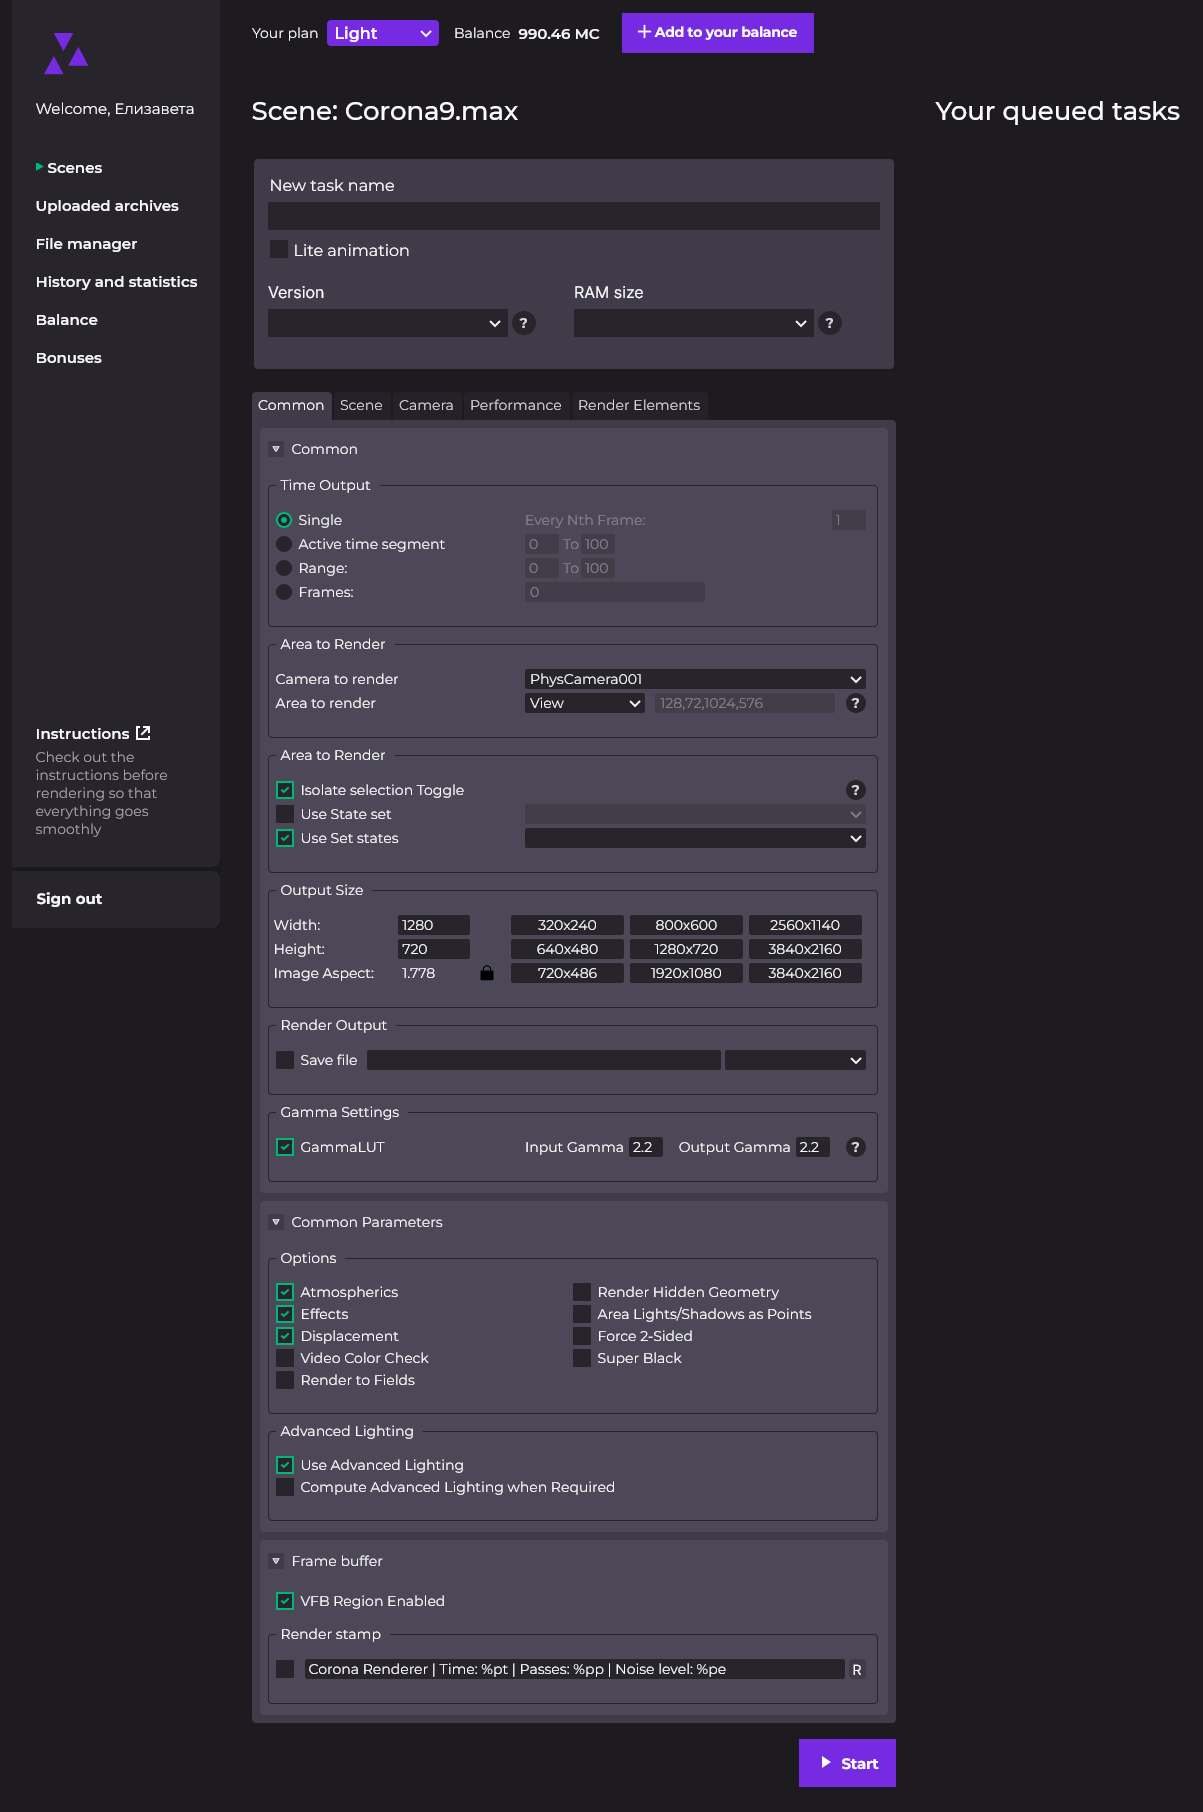
At the top of the screen you will see additional properties: distributed rendering, version and RAM size.
Lite animation
Choose this option if you have a simple project, in which every frame takes a short time to render. This way, the task will be assigned to several less powerful servers, which will reduce the overall rendering time and its total cost. If you have only one frame, rendering will take longer and there will be no effect on the total cost.
Version
Choose the version of 3DS MAX and the rendering engine used to create your scene. If there is no exact match on the list, choose the version above yours.
Never choose a Corona or V-Ray version lower than the one you created your scene in!
RAM size
Select the amount of RAM you need to render your scene. This will help us balance the farm load and reduce the waiting time.
Generally, the higher the RAM size is, the fewer computers we have with this RAM size, and the higher the chance is that they will be occupied. It is also not optimal to render smaller and less demanding scenes on the most powerful servers. If you are not sure which RAM size to choose – look it up in our FAQ.
Be careful with denoising. Many render engines (including Corona Renderer and V-Ray) use a single processor during denoising, and during distributed rendering all other CPUs will go on standby, but you will still be charged for renting them.
If you want to avoid this and save on denoising follow the instructions here.
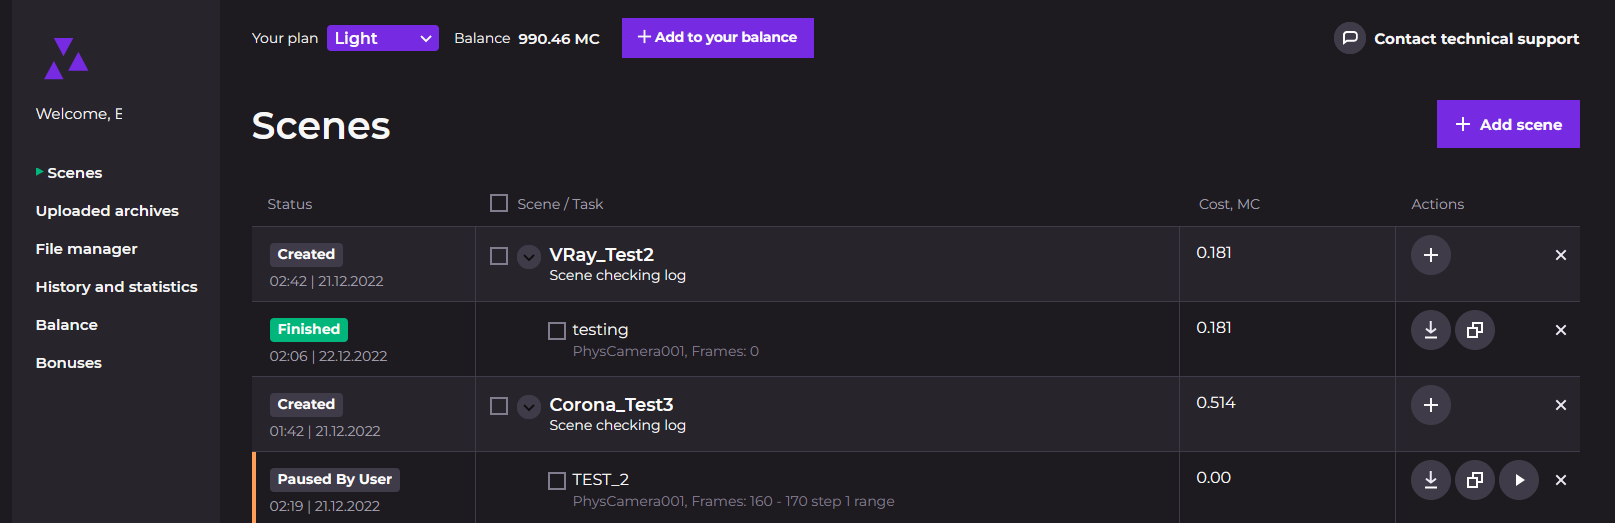
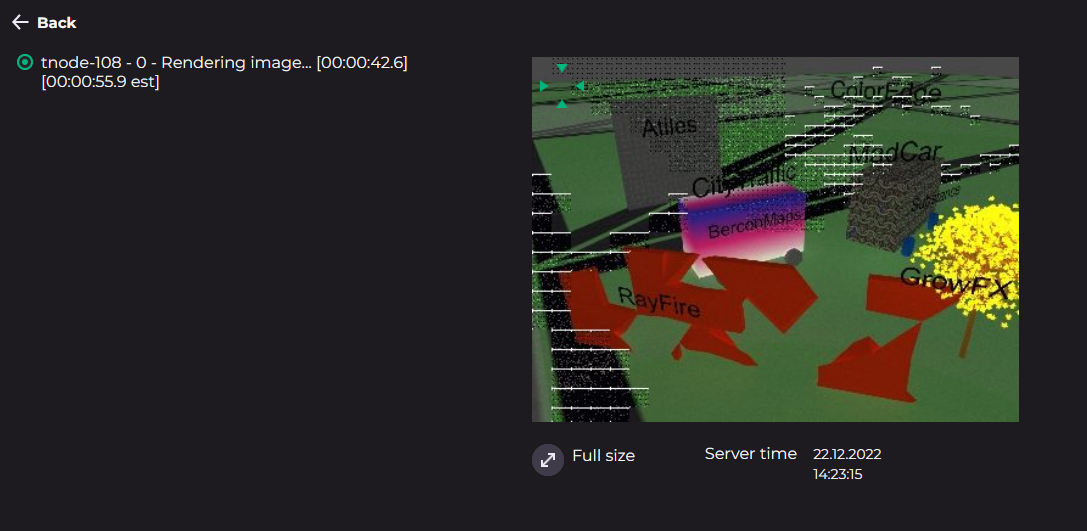
You can now track your project's status:
- QUEUED - your project is in the queue

- STARTED - your project is being prepared to run

- RUNNING - rendering is in process

- FINISHED - rendering is finished

- PAUSED BY ADMIN - your project was paused by the render farm administrator.

- PAUSED BY BILLING - your balance reached zero and our system stopped your projects.

How to download the results?

REMEMBER: All the uploaded files are stored on our render farm for 30 days. You can prolong this time by contacting our tech support.
How to install our plugin?
1. Download the plugin using this link.
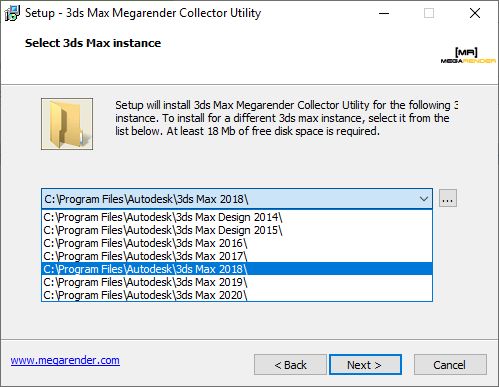
2. Make sure to close all the running instances of 3ds MAX.
3. Launch the installer you downloaded previously.
4. On the version page, choose which 3ds MAX version to install the plugin for. Note, that you’ll need to install plugins SEPARATELY for each 3ds MAX version.
5. The last page of the installer will show how to access the plugin.
How to use our plugin?
1. Remember, that before starting the export, you have to merge all the XRefs into the main scene.
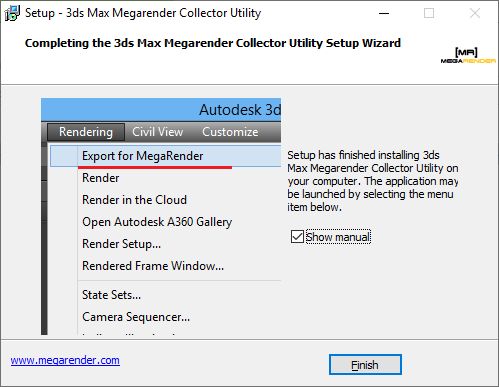
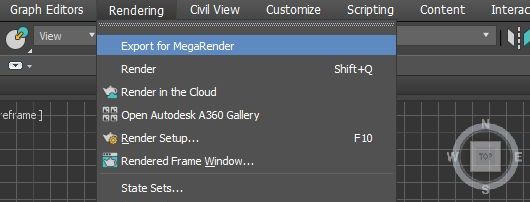
2. Launch the plugin from the “Rendering” menu by clicking “Export for MegaRender”.
3. The plugin will start gathering information about all the assets used in the scene. Depending on the complexity of your project, it can take up to several minutes.
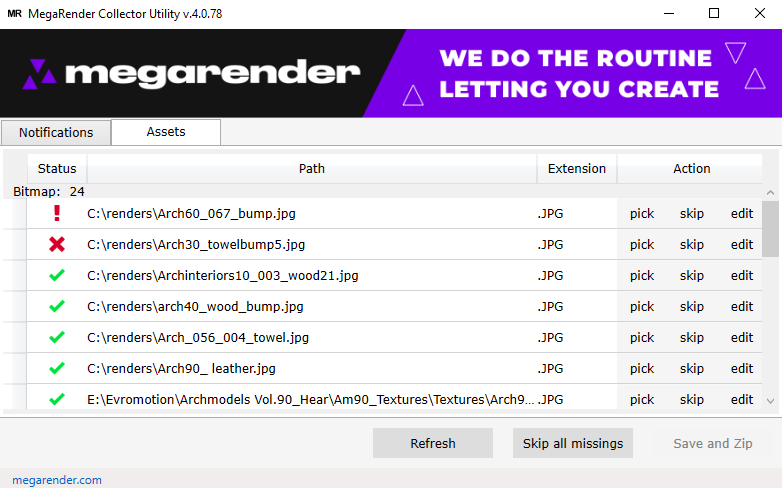
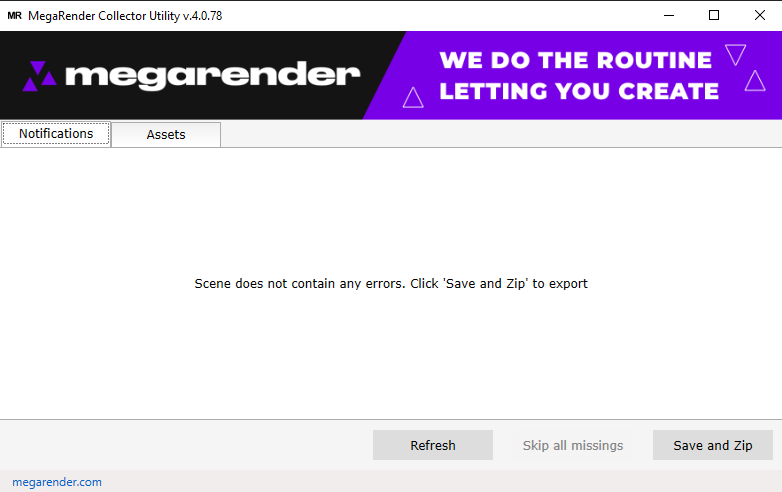
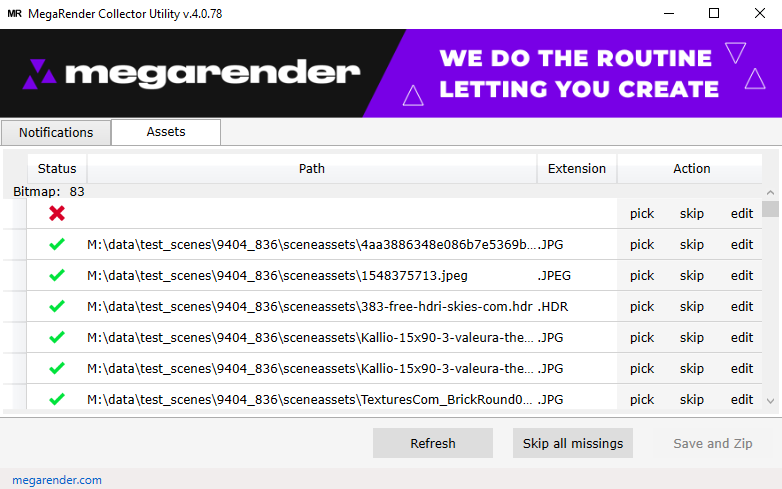
4. After the analysis is complete, you’ll be able to see all the gathered assets in the “Assets” tab, divided by categories: Bitmap, Cache, and Sequence. In the “Notifications” tab you can see the descriptions of possible errors. Red critical errors must be fixed prior to sending the scene to the farm by clicking the “Fix” button. Yellow notifications warn you that your software version may not be supported on the farm; you can ignore these.
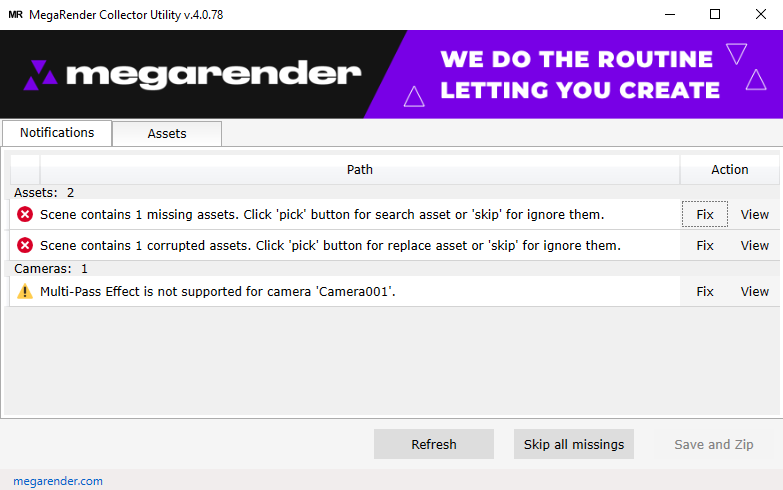
5. All the assets with errors will be displayed first in their category. Remember, that some of them can be in a different category and show up at the bottom of the list.
6. The assets with errors can have two types of icons next to them. X – means the required asset is missing, and ! - means the asset file is damaged. You can find the missing file by clicking “Pick”, or if you are sure this asset is not needed in the scene, click the “Skip” button. If you choose “Skip all missing” button, the plugin will skip all the assets with errors and won’t export them. Remember, all of the skipped texture and cache files won’t be received by our render farm and won’t appear on the final image.
7. After all the assets are either found or skipped, click “Save and Zip” to create an archive for the export. Choose the name for it and the folder to save it into. Upload this archive to the render farm through the online service.
If you encounter errors while working with the plugin, you can see the common solutions here.
I see an error while using the plugin, what does it mean?
1. There is an empty line next to an X icon in the “Assets” tab. There is probably an empty link to a texture in one of the materials. You can just skip this texture by clicking “Skip”.
2. Invalid camera name. The camera name contains special symbols or letters of non-Latin alphabets. You can click “Fix” to automatically rename the camera, or click “View” to open the camera properties and rename it manually.
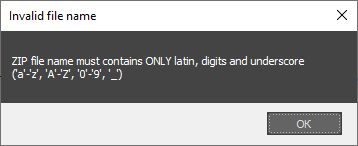
3. Invalid file name. When naming the export archive, use only Latin letters, numbers and the underscore sign. Otherwise the plugin won’t let you save the file and will show this error.
4. Latest 3ds MAX updates are not installed. Plugin may work incorrectly. OR Please install Update 2 for 3ds Max 2019. Commonly, earlier versions of 3ds MAX contain bugs that can interfere with the correct work of our plugin. Installing the latest service packs can help fix the problem. Clicking the “Fix” button will take you to the download page of these latest updates.
5. Render Farm doesn’t support ‘ART Renderer’. You chose an unsupported render engine in your scene properties. If you want to render your project on our render farm using the online service, create your scene with V-Ray, Corona renderer, Mental ray or Scanline.
6. Corona renderer version is outdated. Plugin may work incorrectly. We support Corona renderer versions 2, 3.2, 4.1 and 5.2. Exporting a scene from earlier versions may lead to rendered artifacts and unexpected errors.
7. Render Farm does not support the ‘Viewport selection’ render selected mode. Please, use ‘Include/Exclude list’ setting. You chose “Viewport selection” mode as “Render selected” option on the Corona Renderer “Scene” tab. Our render farm doesn’t support this option, but you can use “Include/Exclude list” instead.

8. Lens file is not specified for physical camera OR Distortion map is not specified for physical camera OR Lut file is not specified for camera OR Multi-Pass Effect is not supported for camera. For these errors, the plugin cannot find files with lens, distortion, LUT or multi-pass effect options for one or more cameras. You can select a path to these or skip them, but be prepared for rendering results that may differ from those you expect.
9. Render Farm does not support scenes with XRef. Please merge all XRefs into primary scene or click ‘skip’ to ignore them. You haven’t merged the XRefs files before exporting. If you don’t know how to do this use our guide.
10. This scene doesn’t have a camera. There is no camera in your scene, and such a project can’t be rendered on the render farm.
11. Scene contains 5 malware scripts. Your 3ds MAX software has been infected by a virus, and your project contains malware scripts. You can click “Fix” and our plugin will remove all the virus code known to us. You'll then be able to export and upload the scene for rendering. However, we still recommend properly cleaning your system of the viruses.
12. Various asset errors. You can find the list of assets with errors in the “Assets” tab.
Scene contains 5 missing assets. - Some files are missing.
Scene contains 3 corrupted assets. - Some files are damaged/corrupted.
Scene contains 2 assets with missing content. - Sequence files contain links to missing files.
Scene contains 4 assets with invalid filename. - Some assets have invalid names. Please use only Latin alphabet, numbers and the underscore sign.
Scene contains 3 assets with invalid file type. - Files with this type/extension are not supported on the render farm. Please convert or skip them.