There are two popular ways of lighting 3DS MAX scenes in Corona Renderer: with HDRI maps or using Corona Sun with Corona Sky. The former is often claimed to be superior when it comes to creating interesting lighting scenarios quickly. For an HDRI not to slow down the rendering, however, it has to be of high quality. Such maps often cost more than others, and take time to build a decent library.
For interior rendering, it is often much easier to light a scene with existing Corona Renderer tools instead. It lowers the chance of fireflies and excessive noise, because low-quality HDRI maps are the main cause of those issues. However, when you first create a sun in the scene, it may look too bright and unpleasant, which is really discouraging. Let’s look at a couple of techniques of creating beautiful lighting with Corona Sun & Sky.
Create sun, add sky
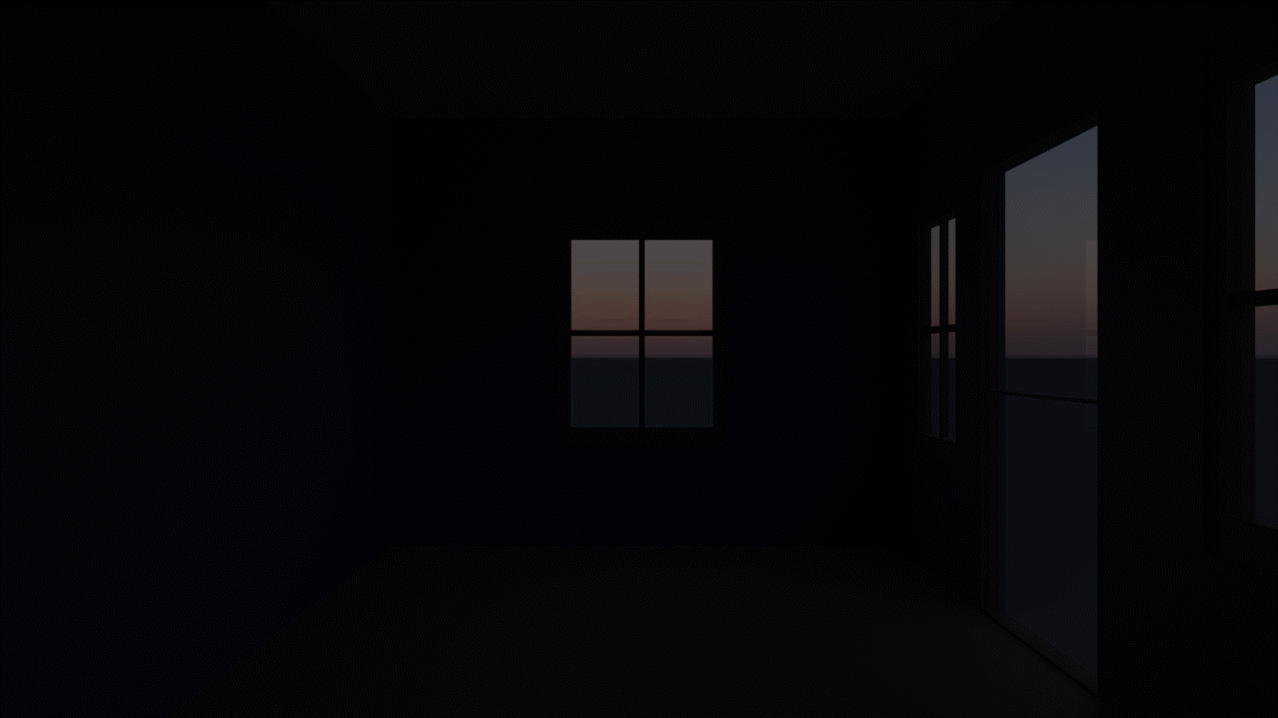
First, create or open an existing interior scene. It is important to always keep all the objects up to scale using either imperial or metric units. In our example, we have made a simple room with several windows and a door to let the sunlight in. This is important to remember: if your room doesn’t let in enough light, it will be challenging to make it look good without faking light sources.
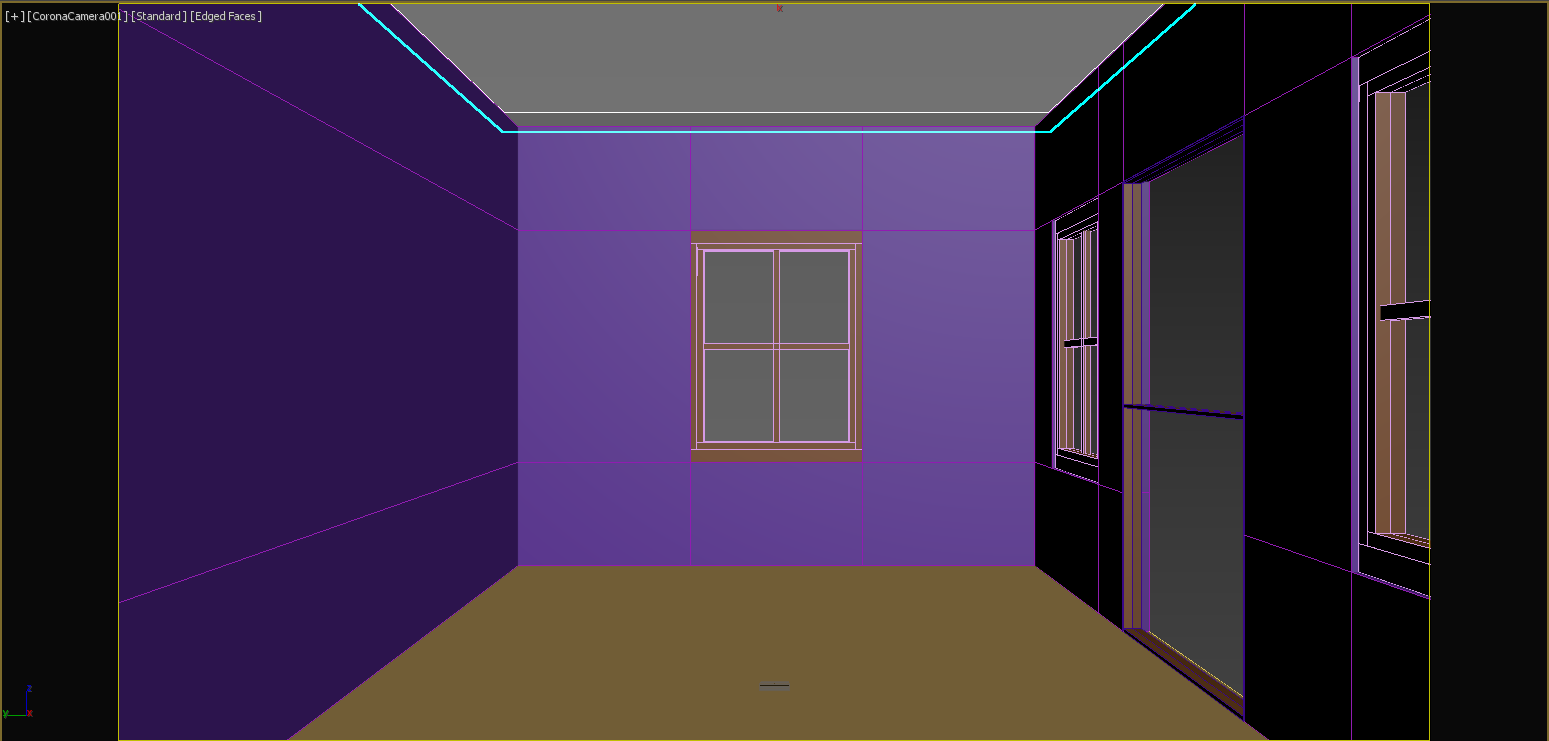
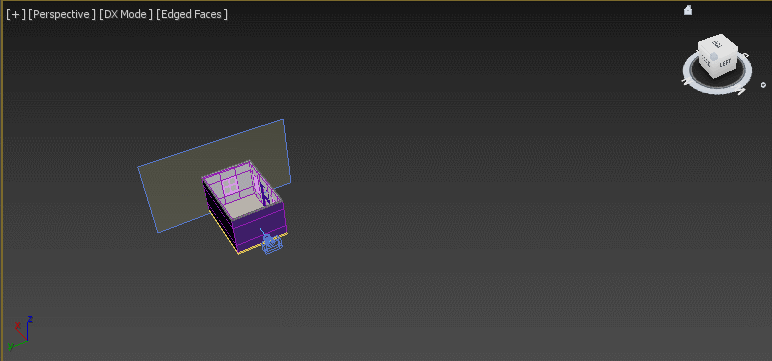
Now, let’s add our sun. Obviously, it has to be located outside the room and far enough from it, in the same way that the real sun is located far away from the Earth. Find CoronaSun in the Create Tab under Lights -> Corona. Click LMB in the viewport to define the location of the sun, then without releasing the mouse button, drag the cursor away from it to set the position of the sun’s target. Finally, when you release LMB, move the cursor up and down to set the height of the sun, and click again. Don’t worry if you messed it up the first time; you can always change the position of both CoronaSun and its target with the Move and Rotate tools. Move the target to the middle of the room for now, and then position the sun to be high in the sky. The distances don’t have to be physically accurate, but keep it at least 10 times higher than the ceiling of the room.
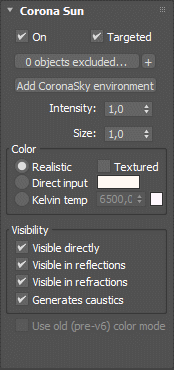
In the CoronaSun settings, click the ‘Add CoronaSky environment’ button. This will make sure that our sun is not just a light source floating in the black void, and that there is a sky around the scene that can change color depending on the sun’s position. This Sun & Sky connection has been further improved in Corona 6, and is now more realistic than ever. We will see how it works later.
 |
 |
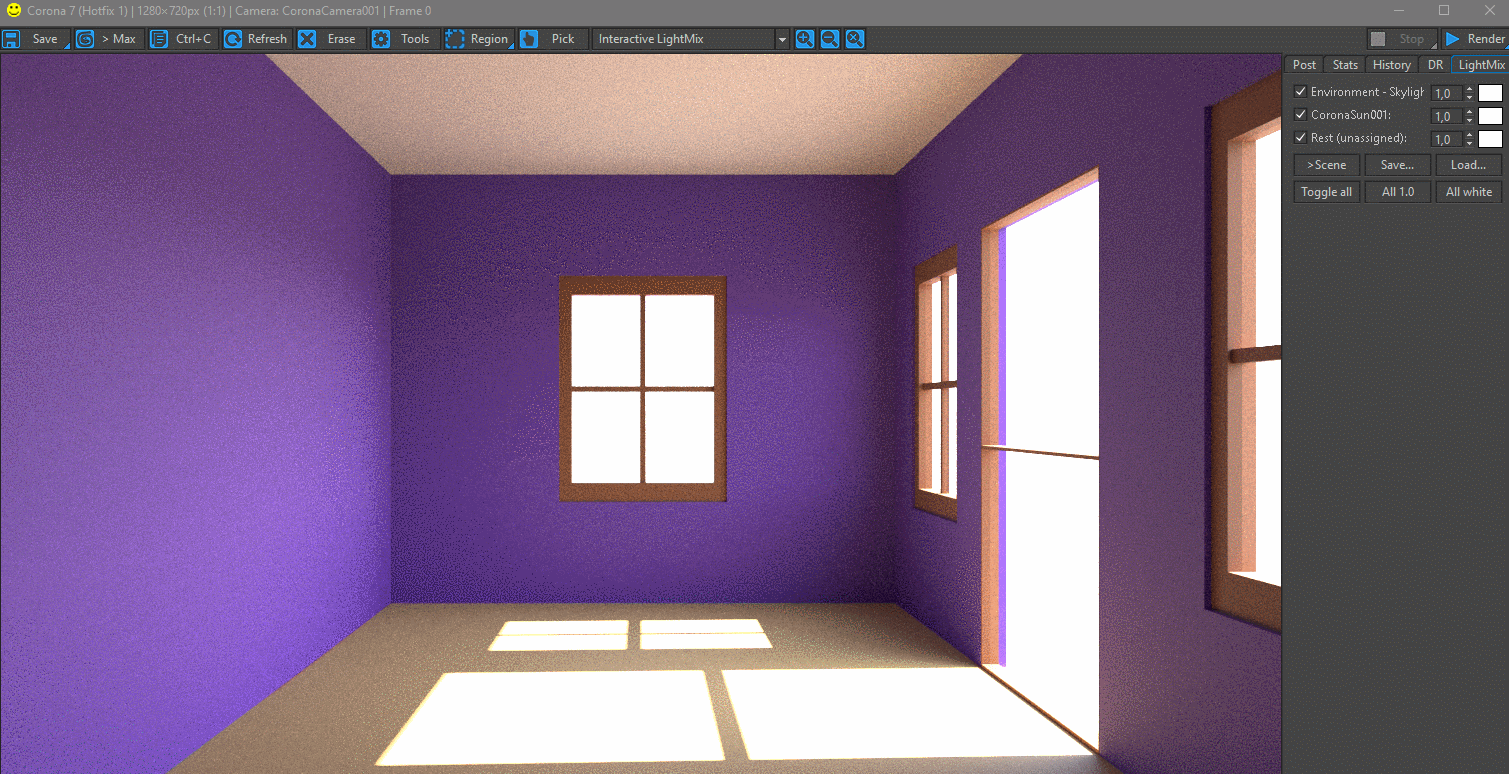
To see the first results, start rendering. It’s very likely that the sun you have set up is too bright. To control it faster, set up LightMix in the Scene tab of Render Settings. The Instanced Lights option will be more than enough for our simple example. Now try reducing the intensity of the Environment first, and the sun itself second. When you are satisfied with the brightness, bake the light by clicking >Scene.
Sharp and soft shadows
Let’s look at the kinds of shadows the sun creates in the room. With default settings, the edges of the shadows are pretty sharp, seemingly even sharper than on the brightest of days. The default CoronaSun may look less realistic than an HDRI map. To soften the edges of the shadows, you have to increase the sun’s size. Try setting the value to 10, 40, or 64 (the maximum). As you can see, the shadows become softer, and with a big sun, you won’t even be able to tell the shape of the windows anymore. This is how shadows and light behave on a cloudy day.

When you only start lighting your scene, decide which weather you’d want it to be outside. If you have a background visible through the windows, your sun has to match it. If it is cloudy outside, but your shadows are sharp, your rendered image will not look realistic no matter how good the materials are.
Time of day
The other neat feature of lighting with CoronaSun & Sky is how they will change color depending on the time of day. To enable this, CoronaSun has to be in the Realistic mode (instead of Direct input or Kelvin temp).This way, the color of emitted light changes with the sun’s position. If it is high above the target, it behaves like the noon sun, the shadows are short and the light is white. When the sun is moved closer to the ground level (Z = 0), the light turns yellow and eventually orange and the shadows elongate. Starting from Corona Renderer 6, moving the sun below the ground is also possible, and the sky will go realistically dark.
If you visualize an actual project, determine how it is situated in relation to cardinal directions: North, West, South, and East. It will help you position the sun realistically and create shadows that appear in reality. This can even give you ideas for the overall design and item placements. For example, it is much better to place the computer monitor where it won’t be regularly lit up by the sun, or at least plan for curtains or blinds. Try moving your sun around the scene while in interactive rendering mode, and see if there are new interesting lighting scenarios that can improve your final image. Making several shots from the same camera but with different sun positions is a great way to add realism to your project.
—
At Megarender, we take the slowest and dullest part of the routine off your shoulders. Sending your scenes to our Corona render farm gives you more time to perfect your projects and even frees your computer for more fun activities, like watching movies or playing games. Start rendering now with a welcome bonus and test our capabilities and the quality of the automatic service.


