3DS MAX allows the creation of complex scenes containing thousands of objects and millions of polygons and vertices. The more objects there are in the viewport, the greater the chance to accidentally move something you didn’t mean to. This problem haunts new users who are just learning to use the software. Is there any way to lock object position in 3DS MAX? There are actually two!
Using Freeze
The simplest way is to ‘freeze’ the object or objects. In 3DS MAX freeze works similarly to hide: a frozen object cannot be selected and transformed, however it is still visible in the viewport. It will also continue to perform the already set animation keys, but you won’t be able to add new ones. By default, a frozen object is displayed in a gray shade. If you still want your textures to display, this can be changed in the Object Properties dialog by toggling off Show Frozen in Gray. All of this applies to the viewport only; frozen objects display as intended on render, including emitting light or providing camera lens effects.
|
|
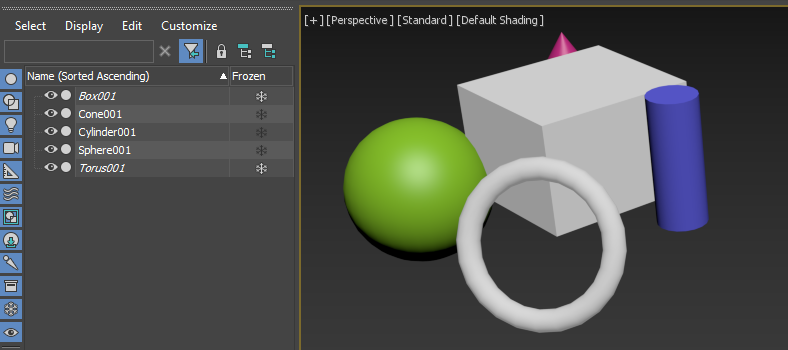
Box and Torus objects are frozen and appear gray in the viewport |
There are several ways to freeze an object in 3DS MAX. First, you can right-click the object and choose ‘Freeze Selected’, this works when you select several objects at once. In the same menu you can choose ‘Object properties’ instead and toggle the Freeze checkbox there. You can also freeze an object right from the scene explorer and the layer manager (the icon may be hidden if the menu is docked). Finally, go to ‘Tools -> Display Floater’ to open a small window containing ‘Freeze’ and other useful tools, like ‘Hide’.
Using Transform Locks
But what if you don’t need to completely freeze your objects? What if you still want to select it and have access to its modifiers and materials? What if you only need to stop it from moving in one direction while moving in all the others? For this, 3DS MAX has transform locks.
Go to the Hierarchy tab (next to Modifiers) and press the ‘Link Info’ button. This is where you can lock object transformation for any axis and for any of the three main transforms. For example, if you lock the Z axis, your object will stop going up and down, but you can still move it around the X and Y axes. Similarly, if you lock all the movement axes, you can still rotate and scale such an object. All locks work with local coordinates.
|
|
Box has locks on X and Y axes and can only be moved up and down |
Take note: if there are key frames already applied to the object, they will not disappear. The animation will play just as before applying the locks, but you won’t be able to affect the transformations to create new keys for them. If you want to remove any movement from the object, you will have to delete all the keyframes before using transform locks.
This is an article from our CGI Academy section. You can find more tips, tutorials, and news about 3DS MAX and 3D industry in our Megarender Blog. Start rendering fast with a free trial on Megarender online render farm by clicking the Sign Up button in the top right corner.


