The easiest way to create a photorealistic material for interior visualization is to use high-definition textures — for example, created from 3D scanning. Finding, buying, and creating such textures takes a lot of time and costs money. Rendering projects with large textures also requires access to a large volume of RAM. The more such materials there are in the scene, the more demanding Corona Renderer becomes on the hardware. However, not every material has to be created with textures; great results can be received with procedural maps built in 3DS MAX and Corona Renderer. They are best suited for objects in the middle and far distance without manual UVW maps. Let’s learn how to make a procedural fabric material in Corona Renderer and 3DS MAX.
Most materials in Corona Renderer differ in how they reflect the falling light; this is controlled by Reflection Glossiness and Fresnel IOR parameters. Fabrics such as satin, silk, and velvet reflect almost no light directly, but they have a noticeable sheen on the peaks of their folds. Such an effect can be simulated through the use of a Falloff map, included in 3DS MAX by default. This map can also be used in the Reflection slot; however, we are going to create the whole material in the Diffuse slot.
This article is aimed at newbies who are already familiar with the 3DS MAX interface, the basics of modeling, modifiers, and materials. The lesson is a step-by-step guide — we will not explain the functions of all the buttons, but we will point out all of the important ones.
Basic fabric material properties
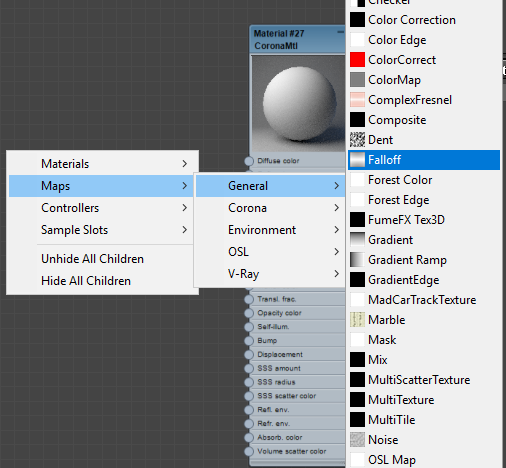
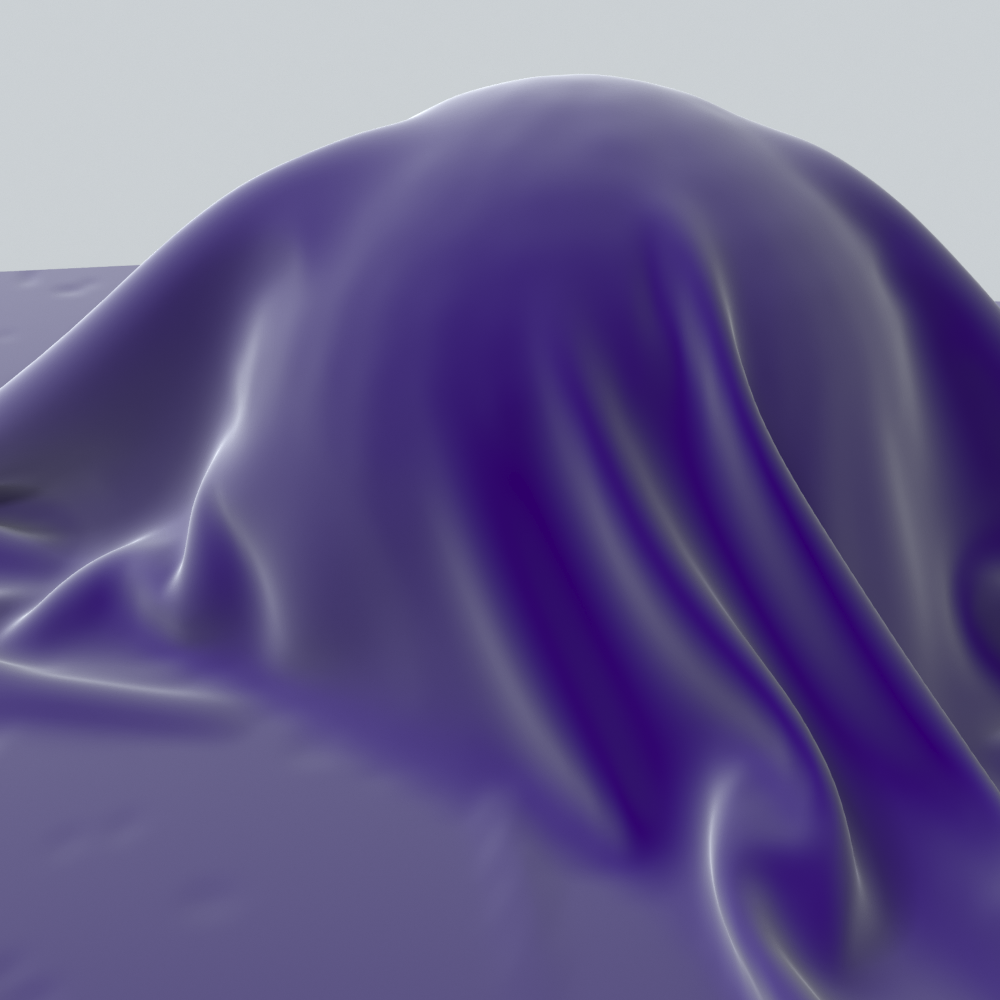
First, let’s figure out what the Falloff map does and why we are using it. Create a new CoronaMtl material, then pick Falloff from the General menu and connect it to the Diffuse slot. Apply this new material to the test object without changing any settings to see the intermediate result. Depending on the object, effects may differ, but the main principle stands: when the camera is aimed at the surface directly, it shows the dark color, and when it is at an angle, it becomes lighter. In our example, the model of cloth (created with the Cloth modifier) has a distinct white sheen on the peaks of its folds.
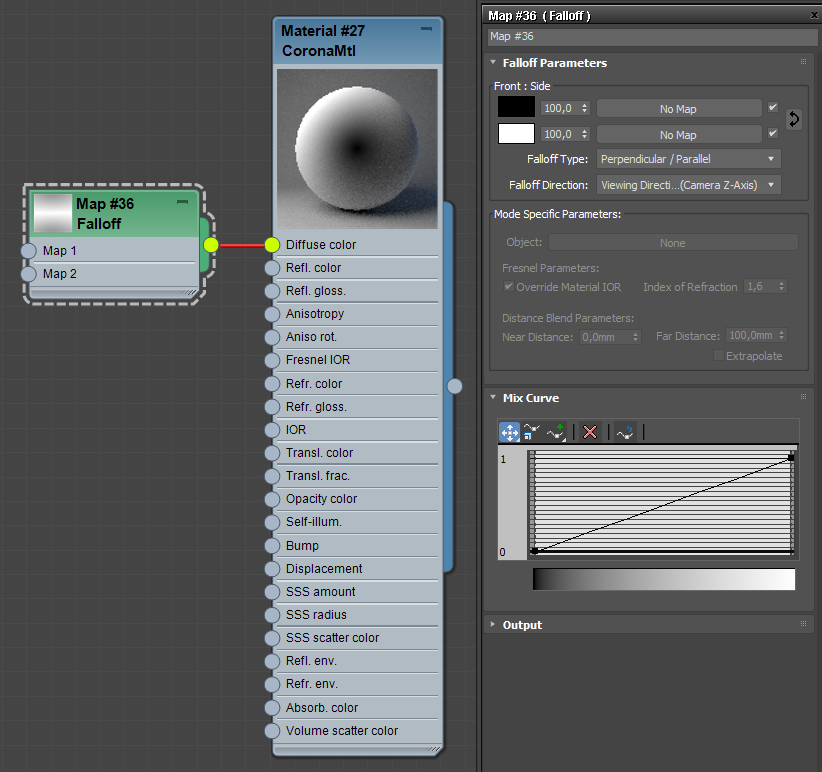

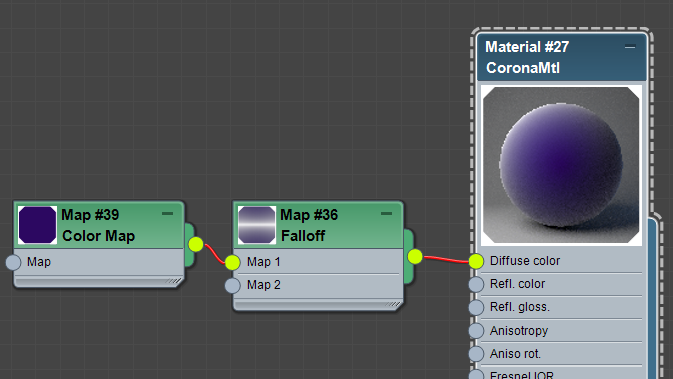
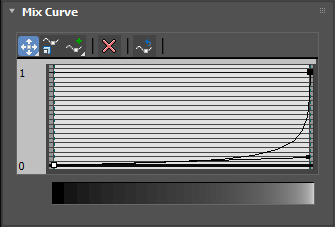
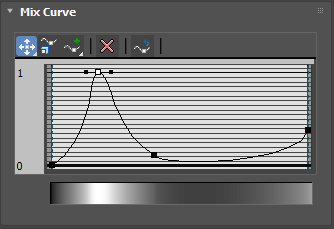
To increase realism, change the shape of a Mix Curve in the Falloff settings. Transform the end points to Bezier-Corner by right-clicking them and choosing the corresponding function. Then, pull on the newly created control points to make the curve much more concave. Now add color to the fabric. The color can be set through a picker in Falloff, but we will use a Color Map instead for a better material structure. Color Map is available in Maps → General starting from 3DS MAX 2017.
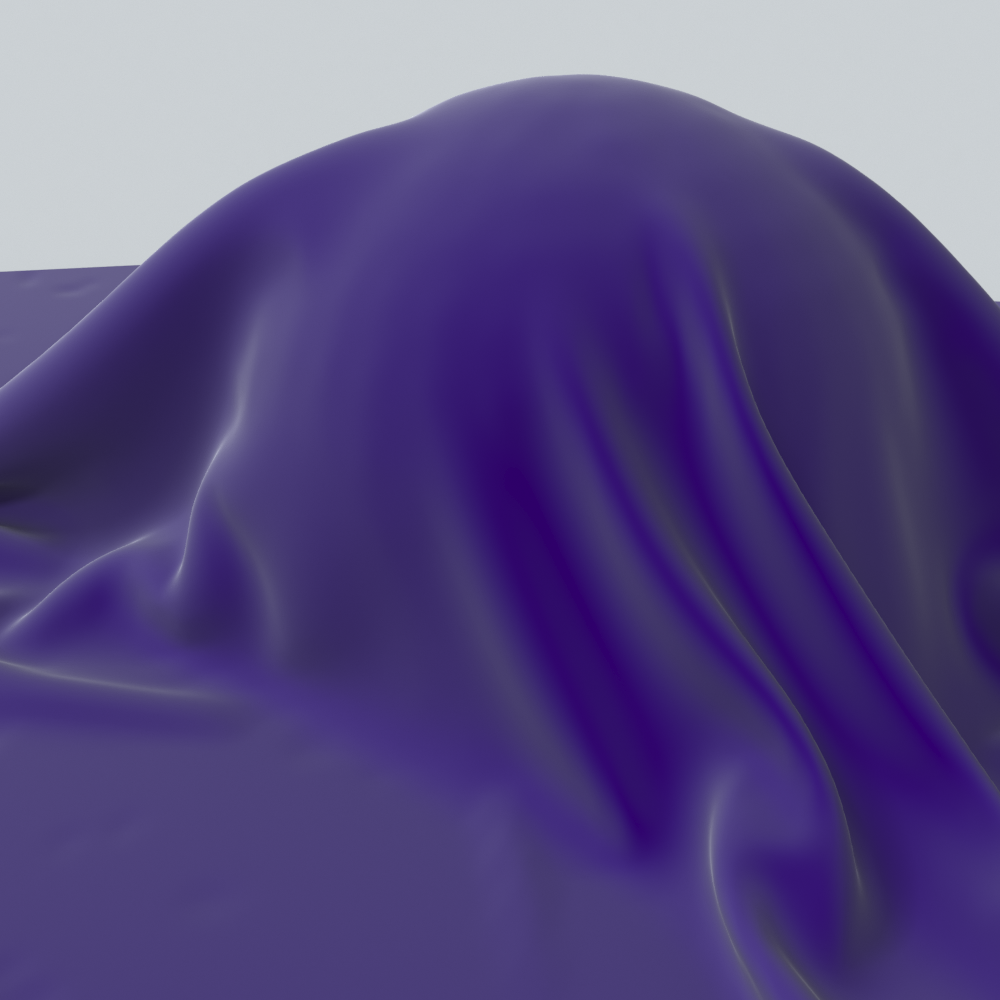
This fabric material already looks like satin, so it can be used for objects in the background. If you don’t like the shape or brightness of the sheen, try changing the shape of the Mix Curve. Don’t be afraid to experiment. Below are two more examples.
|
|
|
|
Adding details and increasing realism
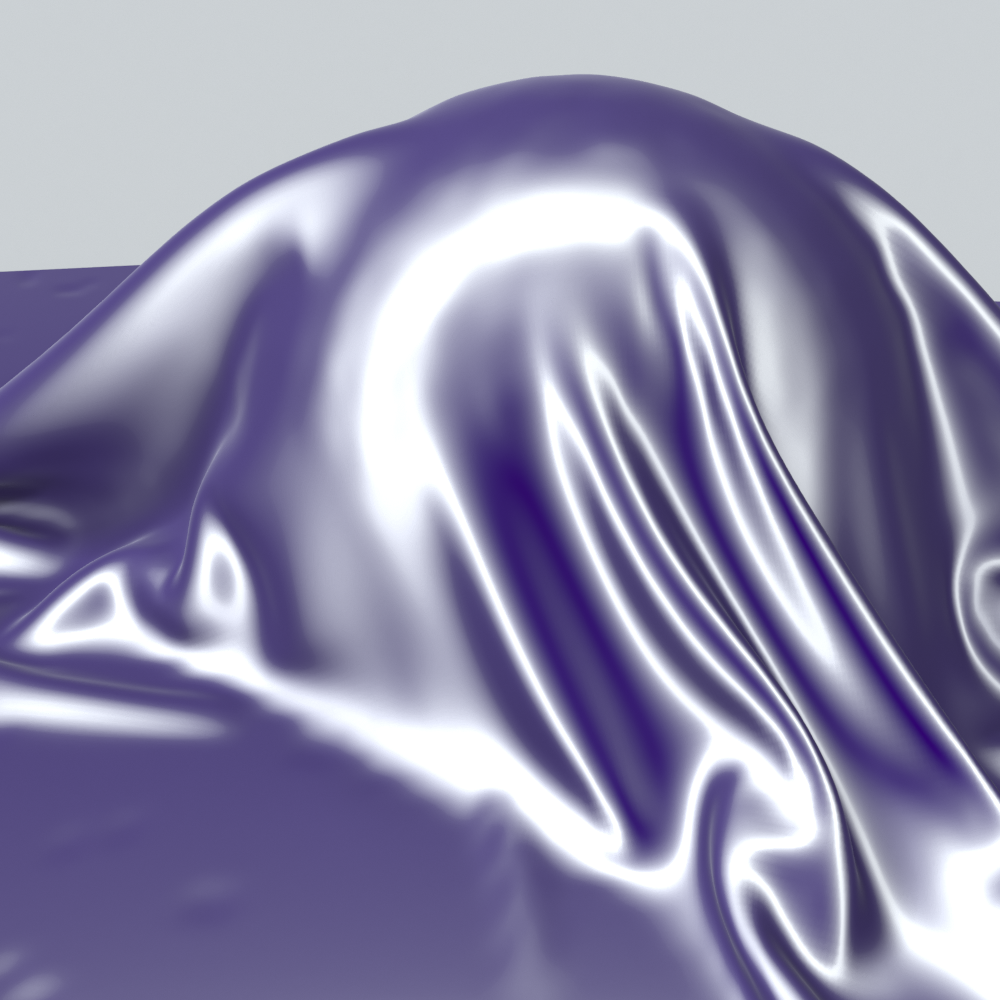
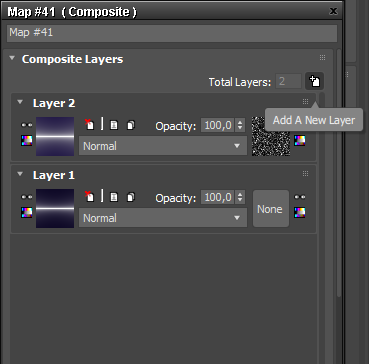
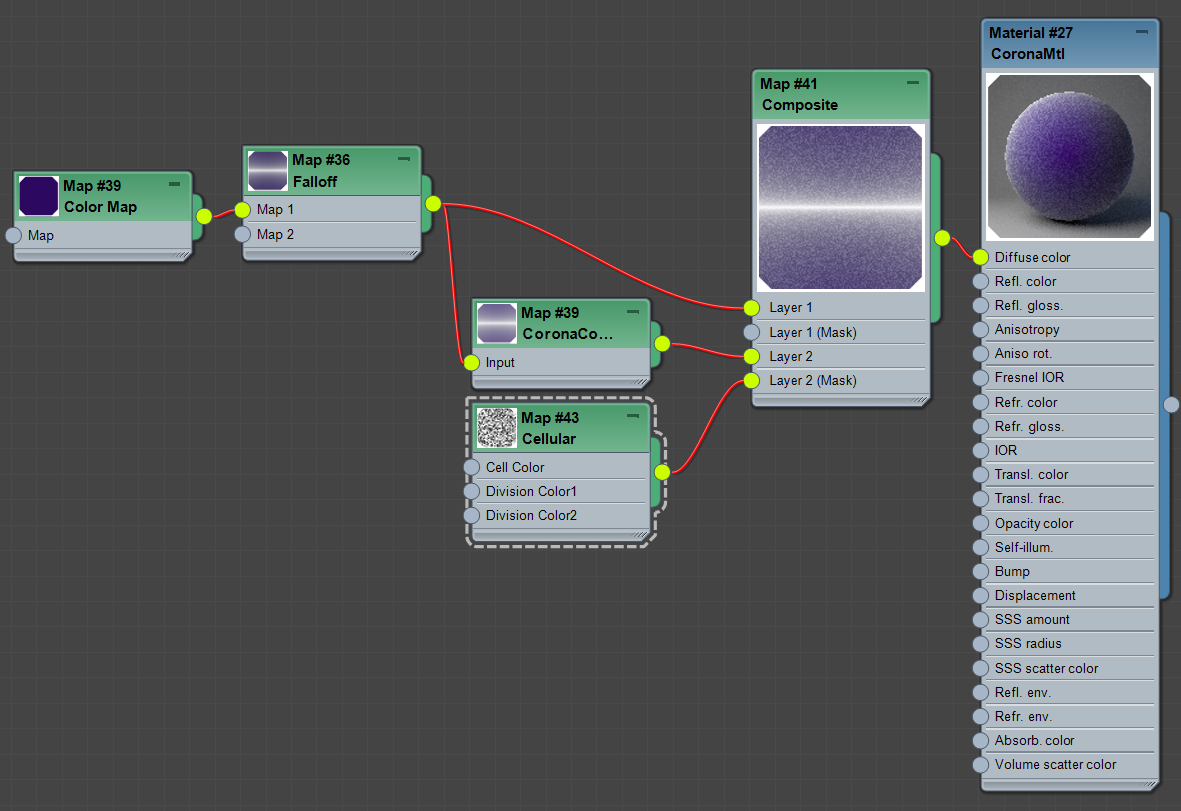
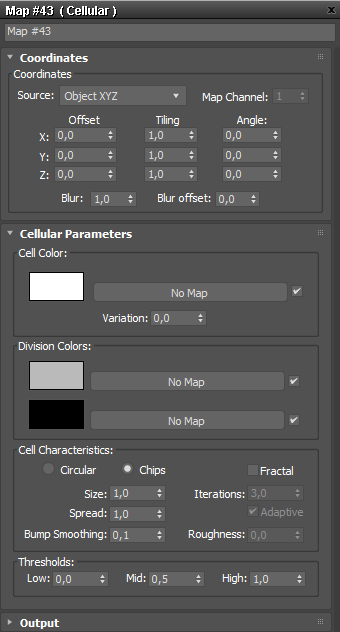
To make this fabric more realistic, let’s add some noise. This will simulate unevenness of color which every real-life object has. Insert Composite and CoronaColorCorrect maps between Falloff and CoronaMtl. Put Falloff into the first slot of Composite, then create a second layer. Assign the same Falloff node to CoronaColorCorrect, raise the gamma to 1.4–1.5, and slot the result into the second layer in Composite. Finally, add a procedural Cellular map with Size = 1 to the Layer 2 (Mask) slot. As a result, lighter spots are scattered all across the darker material. If you don’t notice the difference, try different Size or Cell Characteristic values. It’s best not to use interactive rendering for this, as the noise and automatic denoising will interrupt the effect.
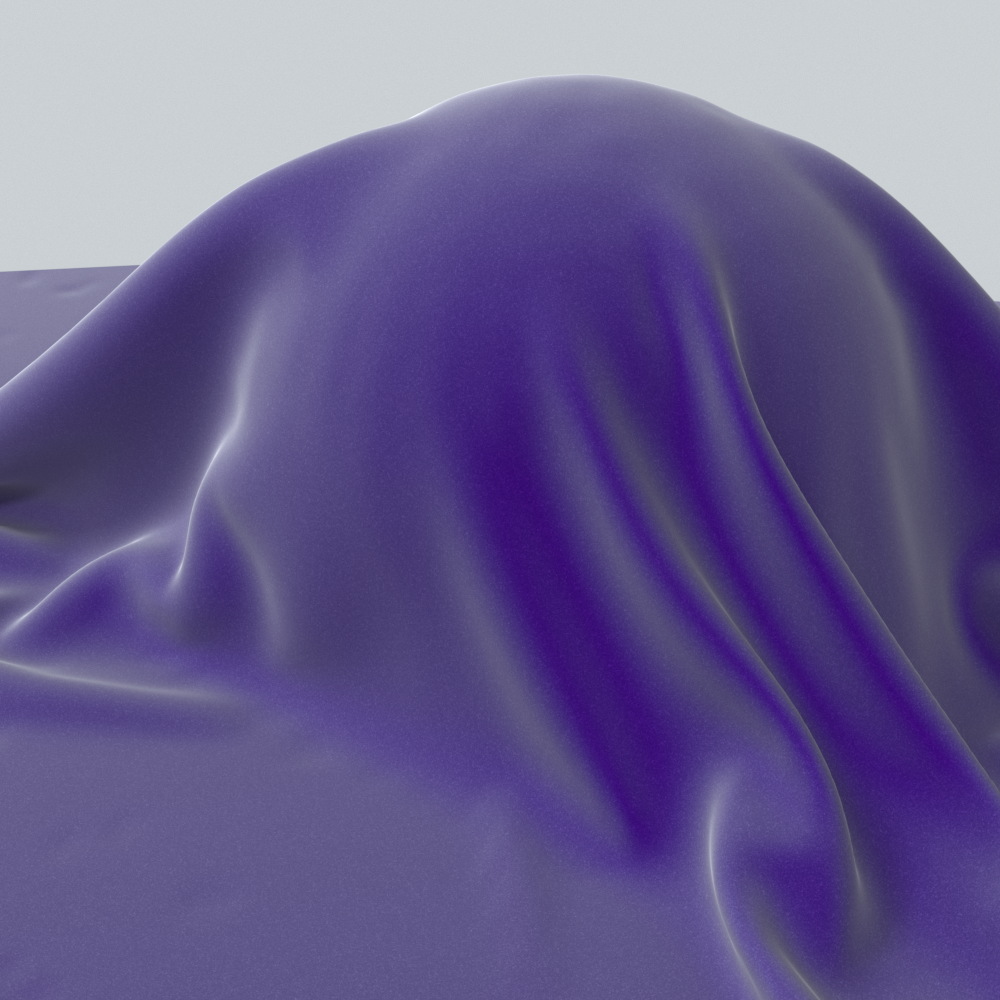
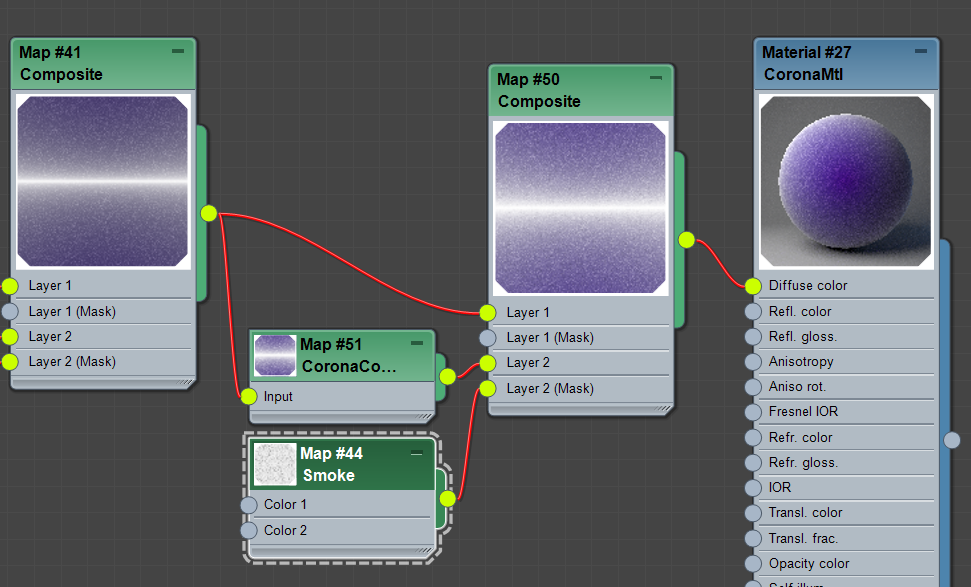
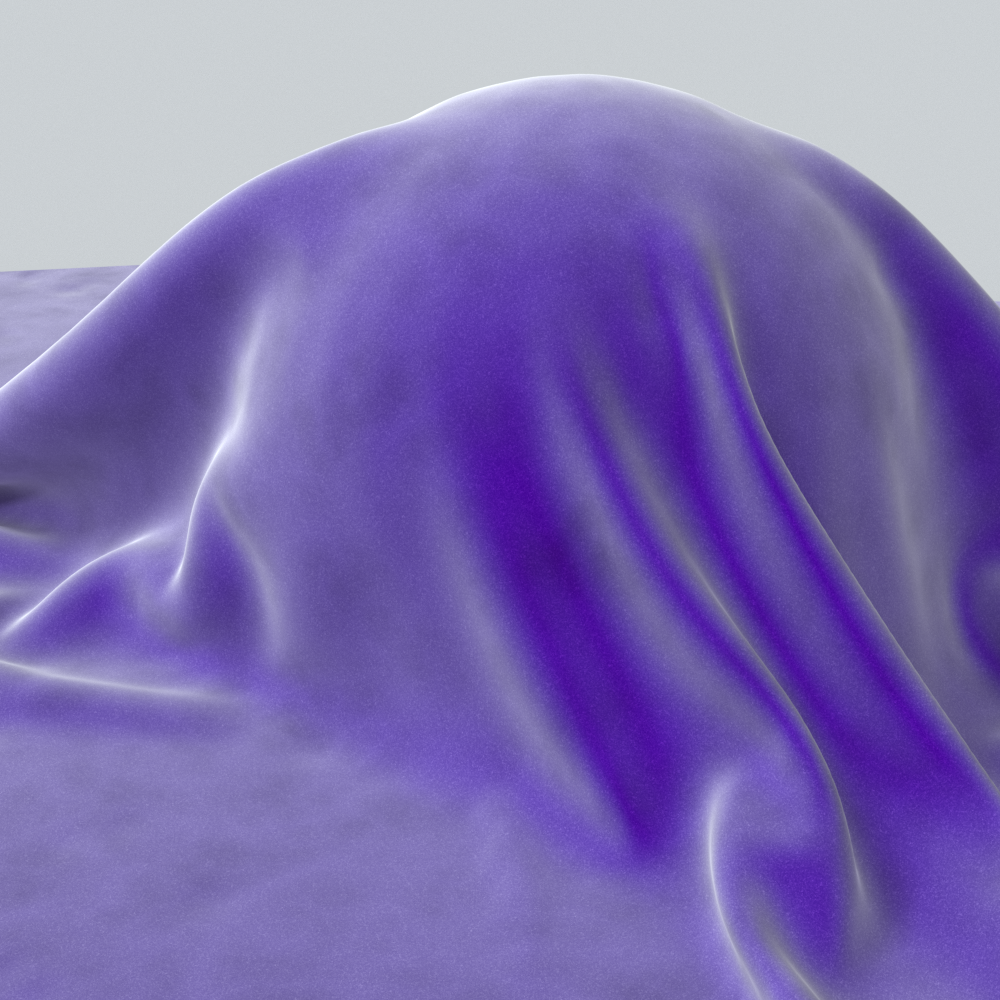
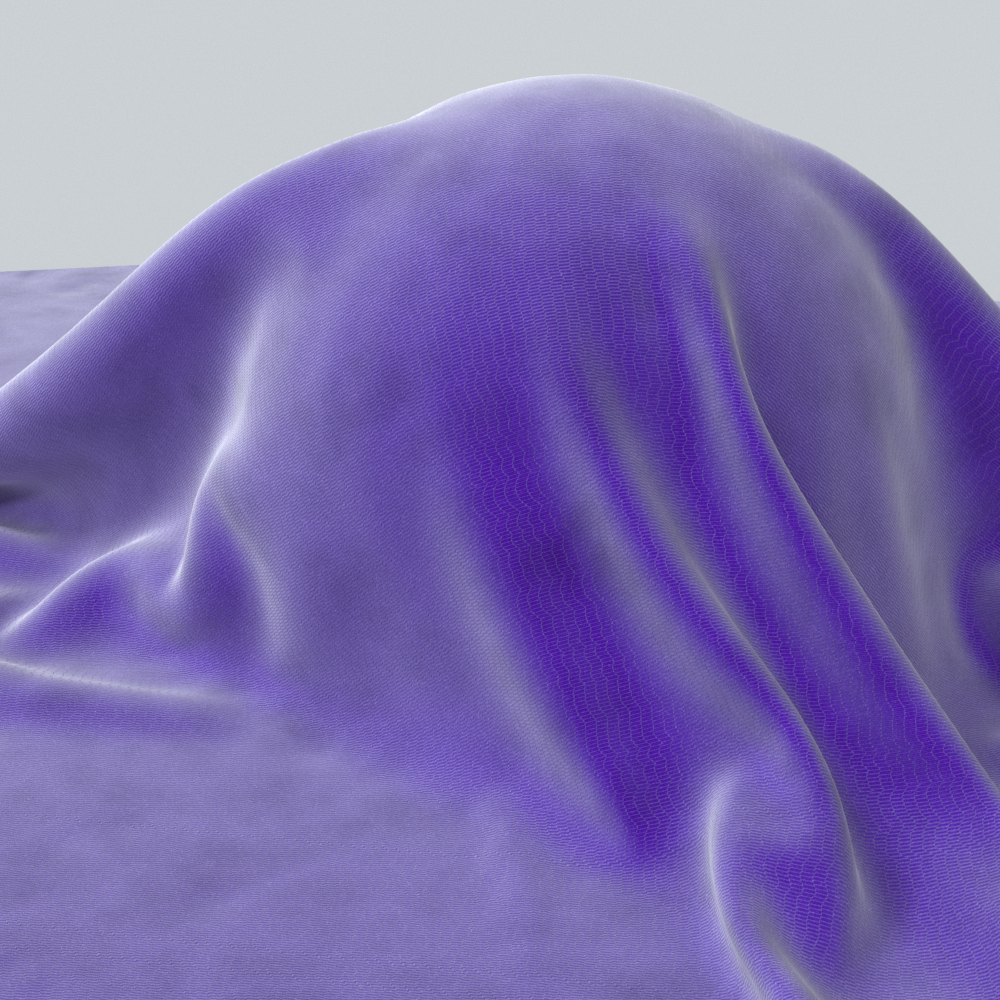
In addition to the small noise, there are also bigger dark spots on fabrics appearing from constant use. Usually, these areas come from where they were touched by people or other items. We can create a similar effect using a Smoke procedural map (available in Maps → General). In the same way as before, mix the current material with CoronaColorCorrect through a Composite node. Set Brightness to 0.2 in CCC settings (you can increase or decrease this value to change how noticeable the effect is). In Smoke settings, switch the order of colors and set Size to 100, then put the result into the Layer 2 (Mask) slot of Composite. Now, by changing Size and Brightness values, you can create the right effect.
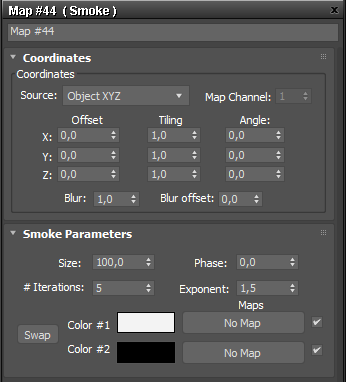
The offered Size value may not fit the scale of your scene. If you can’t see the effect, try changing it to 10 or 500, and then find the most suitable value.
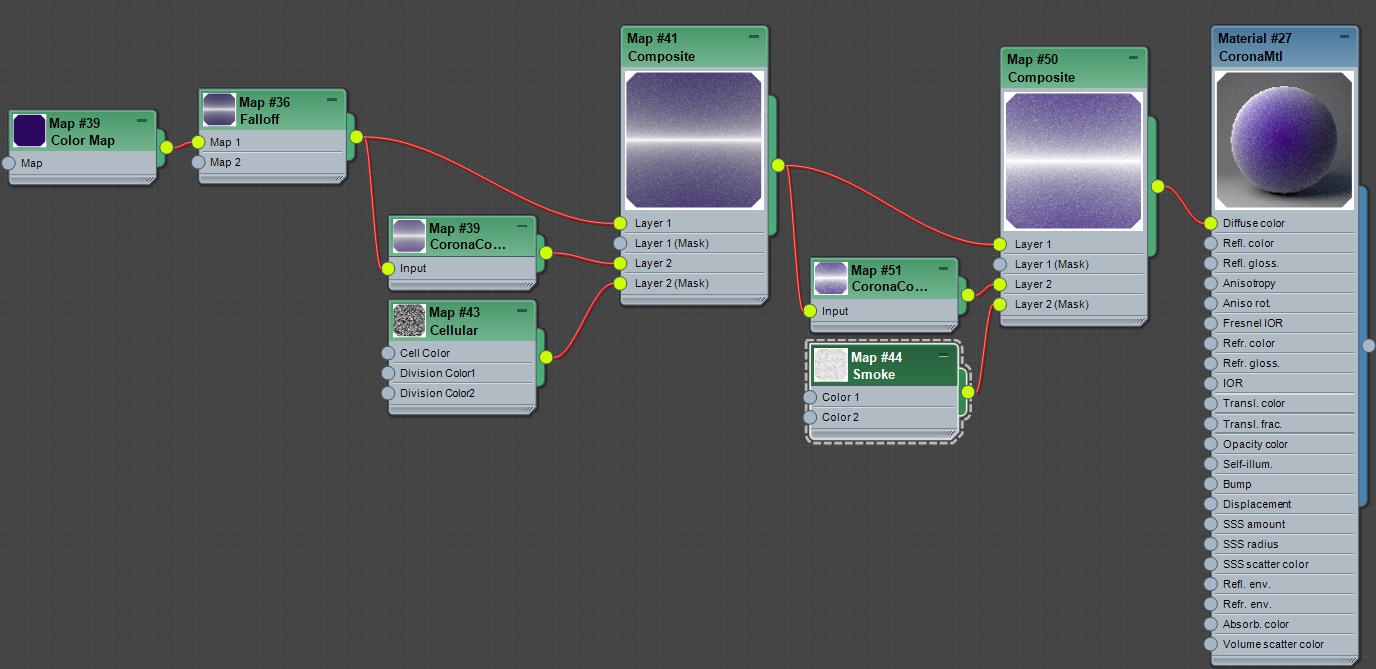
Here is the final structure of the fabric material:
Tips for Bump
Usually, the texture used in the Diffuse slot is turned into grayscale (in Photoshop or via ColorCorrect) and assigned to Bump. Our material doesn’t have an obvious texture for this, but we can create one from scratch. For example, the Checker procedural map may look like fibers if you set one of the Tiling values several times larger than the other. It’s important to pick a fitting scale for the map and then put it into the Bump slot with strength set as 0.2–0.4.
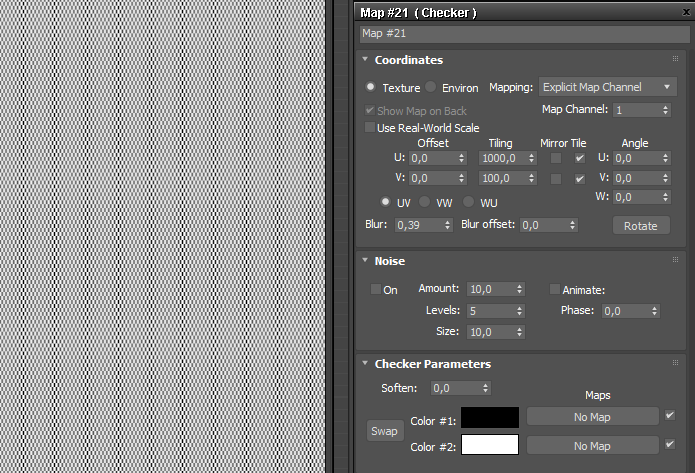

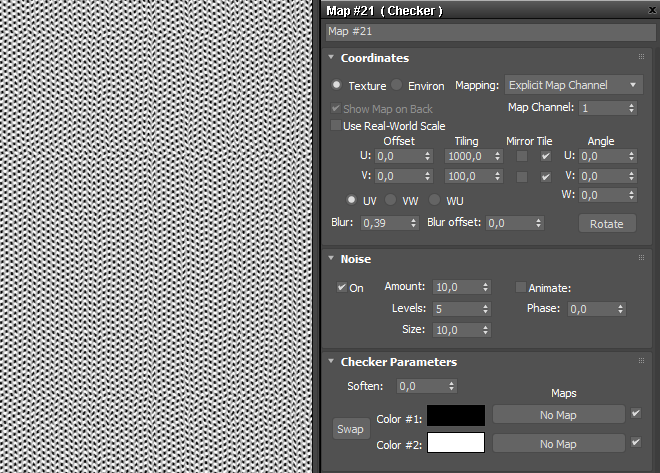
It is easy to add a random element to Checker through the Noise tab. Try different values in Amount, Levels, and Size.
To make the intermediate result visible in the Material Editor, right-click the map and choose Open Preview Window. Enlarge this new window so the texture becomes easier to discern.
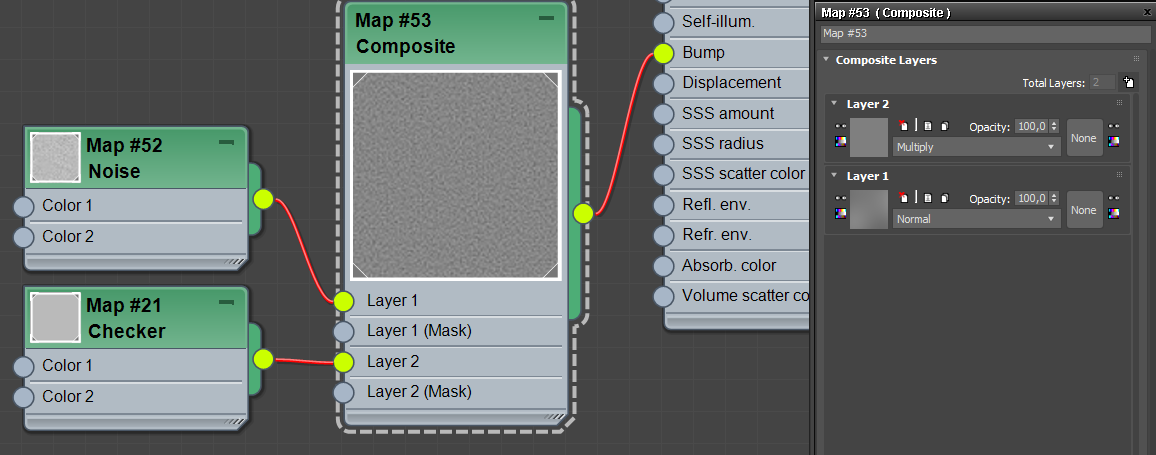
Finally, you can mix Checker with a Noise map (or another procedural map of your choosing) through Composite. Instead of a mask, set Layer 2 to Multiply. Always experiment: invert the maps, change their brightness and contrast through CoronaColorCorrect, and try different values for size and strength of the noise.

Complicated materials are crucial when rendering high-resolution images. This is where demand for big, heavy textures and high realism comes from. However, high-resolution rendering doesn’t have to be time consuming. Launch your project at Megarender online render farm, and it will be rendered using the most powerful servers much faster than on any personal computer. Use our calculator to approximate the cost, and start saving your time!


