If you ever felt overwhelmed by the task of creating complex geometry in 3DS MAX, you might have looked for third-party plugins to make it easier. Each time you would have seen RailClone recommended again and again. You may even have downloaded the free version to try it out but got lost in the maze of weirdly named settings. In this tutorial, we will show you that RailClone is not intimidating at all, and using it to create complex structures is not that hard.
At its core, RailClone 6 is a rework of the basic 3DS MAX array tool. It takes an object and scatters its copies along a set path. In addition to that, you can add rules to include extra geometry in corners or at even intervals. To create a structure in RailClone, you need three main elements: a RailClone object, a path spline, and the geometry to copy along it. Let’s go step by step and create our first RailClone array, learning the main tools on the way.
Step 1: The Interface
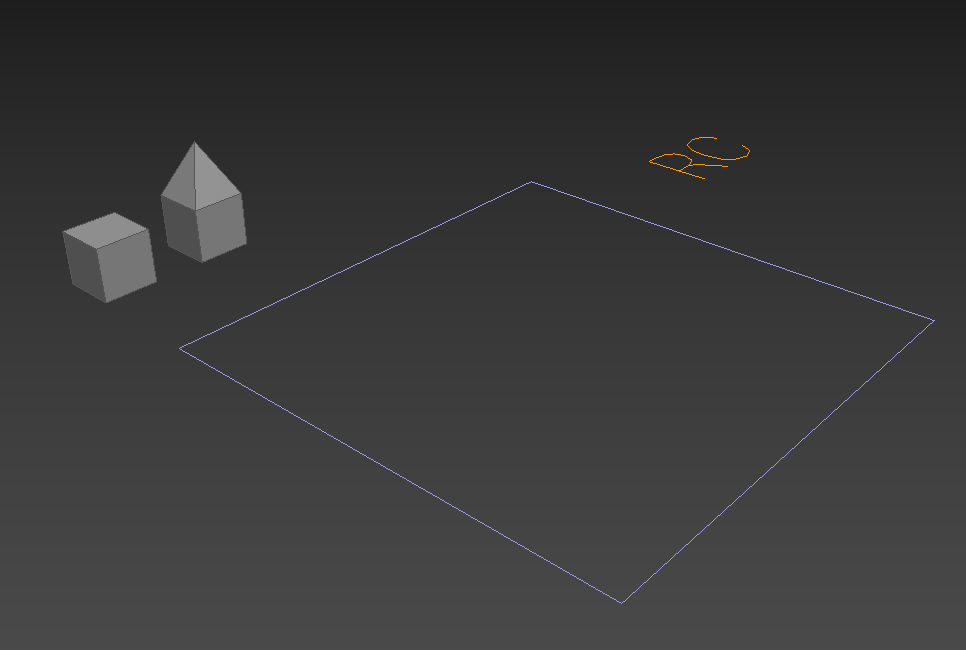
Let’s start by creating our first RailClone-based structure. Create a box and a modified box of the same width and length but with a different height. Then add a spline to the mix; in our example, we are using a simple rectangle. Finally, in the Geometry rollout, pick Itoo Software and create a RailClone object. You can place it anywhere in the scene though it’s advisable to keep it as close to the center as the existing geometry allows. The size of the RC icon doesn’t matter.
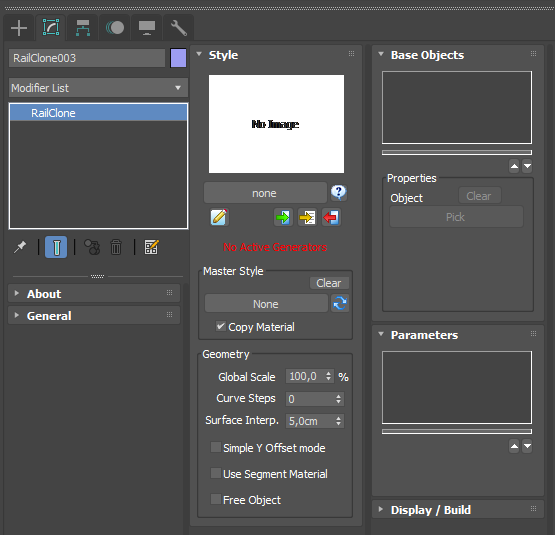
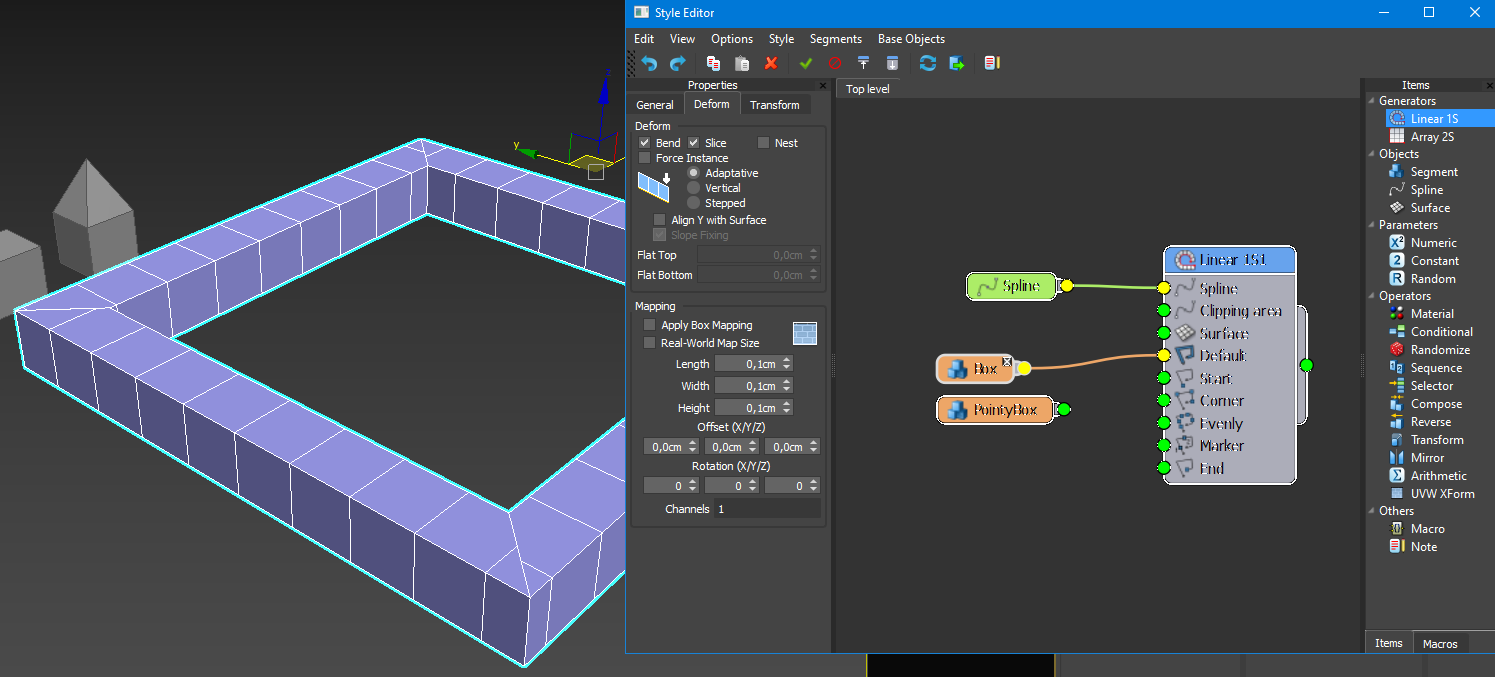
With the RailClone object selected, go to the modifiers tab. Here you will see a wide array of settings, but what we really need is to open the style editor by clicking the pencil on paper icon in the Style tab.
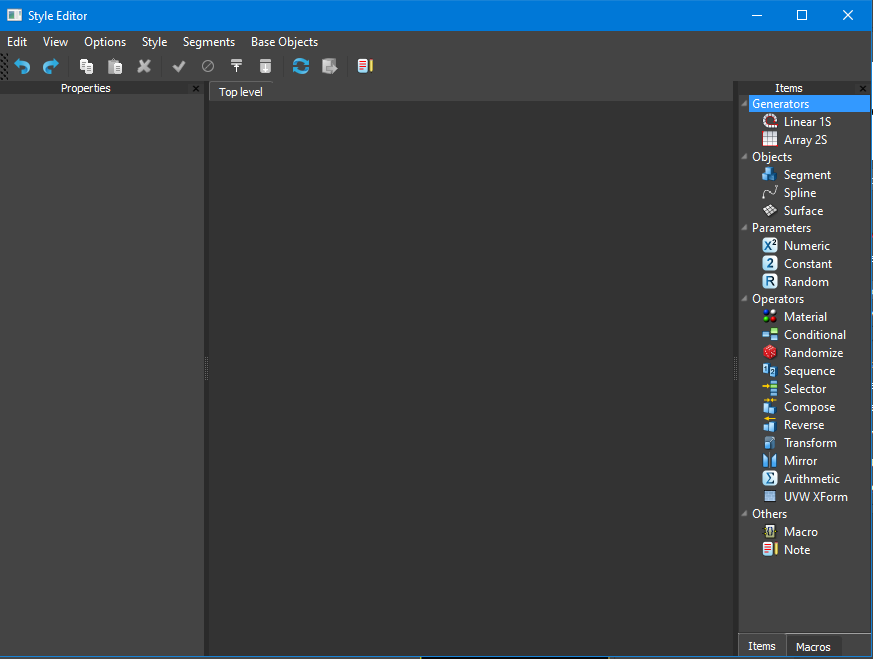
Style editor is the main tool for creating geometry in RailClone; this is where you connect objects and set rules for how they should interact. The foundation of a RailClone object is a generator: Linear 1S or Array 2S. They correspond with one-dimensional and two-dimensional 3DS MAX arrays. 1S lets you position objects along a spline as if you are building a fence; 2S adds another dimension as if you are building a several-storied house.
Step 2: Creating a Linear 1S Array
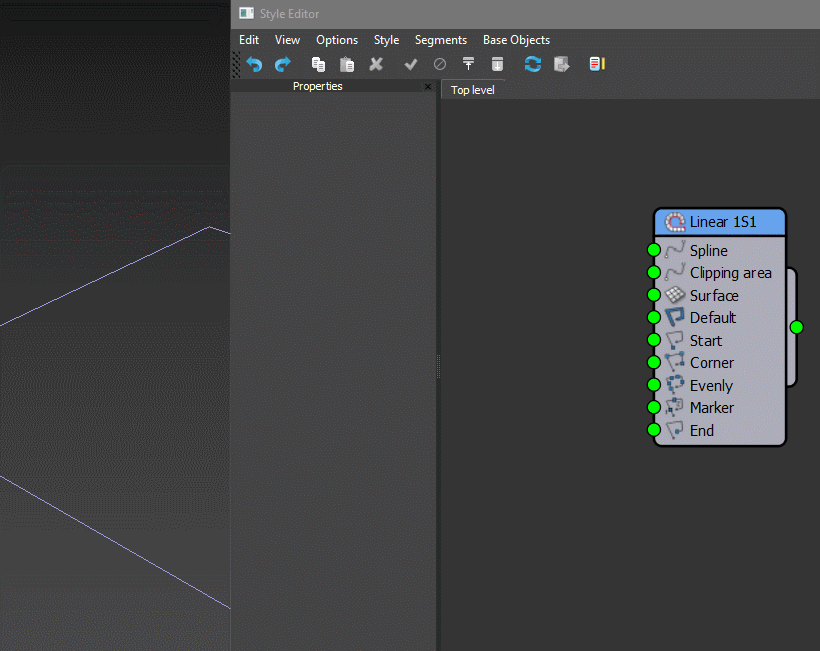
Let’s start with a simple 1S generator. To create it, drag and drop the item from the right-hand menu or right-click in the central area of the Style Editor and select it in Add -> Generators. A node will appear: this is where we will adjust the look of our array. On the left-hand side, you can see the generator’s properties. We’ll look at them more attentively later, but for now, you can use it to rename the generator to something more specific.
The first connection is for a spline, so let’s add our rectangle to it. Pull the first green circle to the left and release to create a new spline node. You can also use the right-click menu and then connect the new node to the generator. In the left-hand menu, select the rectangle (or the spline you need) by clicking the button next to Object.
This is the path we will use to copy our objects along. Speaking of which, let's add both the box and the modified box to the Style Editor without connecting them to the generator yet. As previously, right-click Add -> Objects -> Segment. Click the object button, select the cubes, and rename them for easy recognition. We want the simple box as our main piece of geometry, so connect it with the Default node on the generator.
You now have the simplest object you can create with RailClone — a mesh made of boxes in the shape of our spline. Let’s go to the generator properties and see what we can change. Open the Rules tab and try different Modes to see the difference. Adaptive mode works best when you don’t need to strictly preserve the dimensions of your object and don’t want them cut off at the edges. Select Adaptive mode for this example.
Next step: we want our modified box to appear in the corners. Connect its node to the Corner input of the generator. It doesn’t look right at first, so let’s find out what breaks the geometry. In the segment’s properties, go to the Deform tab. There are several checkboxes for different functions that affect how segments are placed in a RailClone generator. Try turning all of them off and on again just to see the results. As in our example, turn on Force Instance: this way, the modified box will always appear as a whole object without being sliced, deformed, or scaled in any way.
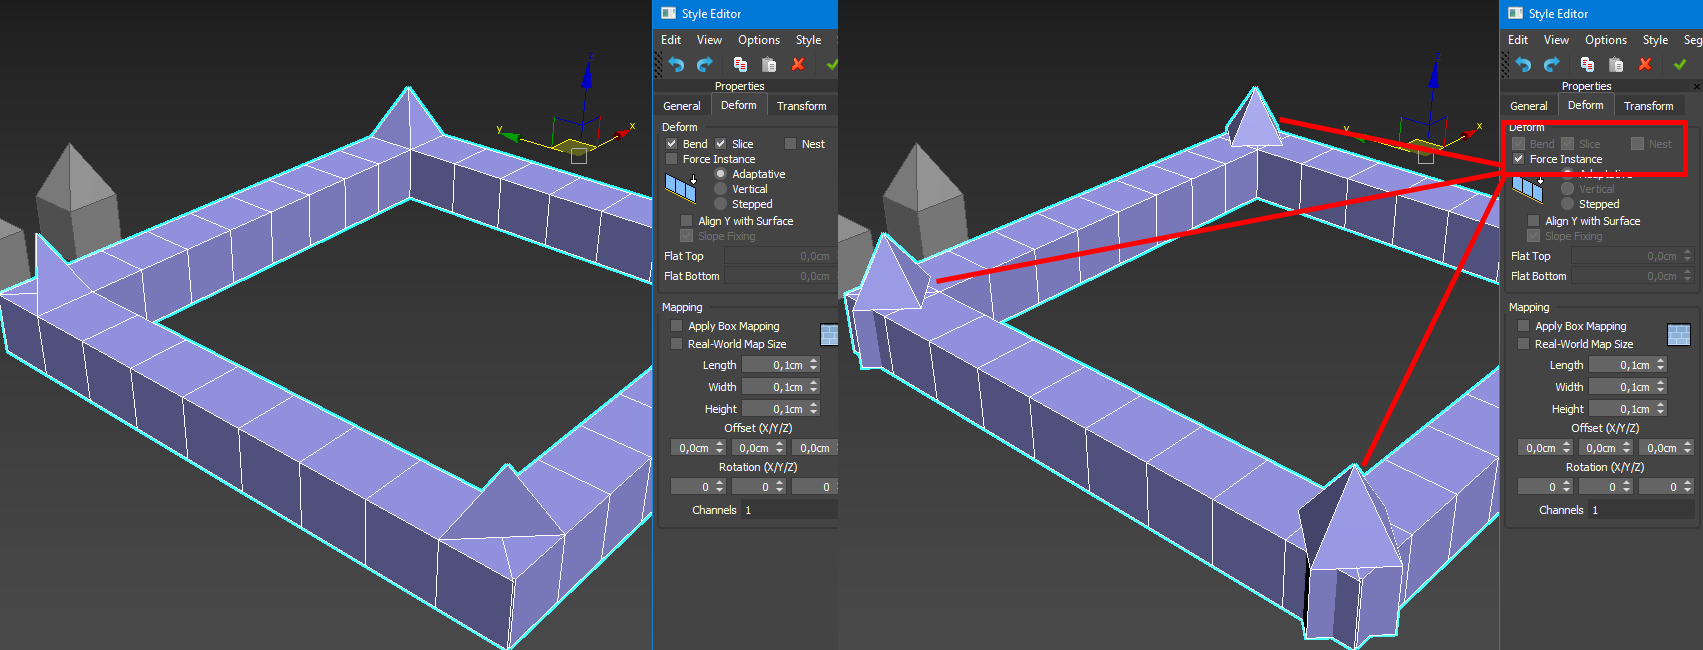
The box is whole now, but it is not rotated the right way. This behavior is controlled by the generator itself. Go to the Rules tab in the generator’s properties and look at the Corner section. It contains different properties that control the behavior of new geometry in the corners. Here you can pick the type of vertex to apply corner segments to and bevel the path of the RailClone object without changing the underlying spline. However, the option relevant to our current problem is Align to Path: it rotates corner segments to follow the spline, which would be useful if we had a rounded rectangle. Right now, turn it off, and the modified boxes will snap into place.
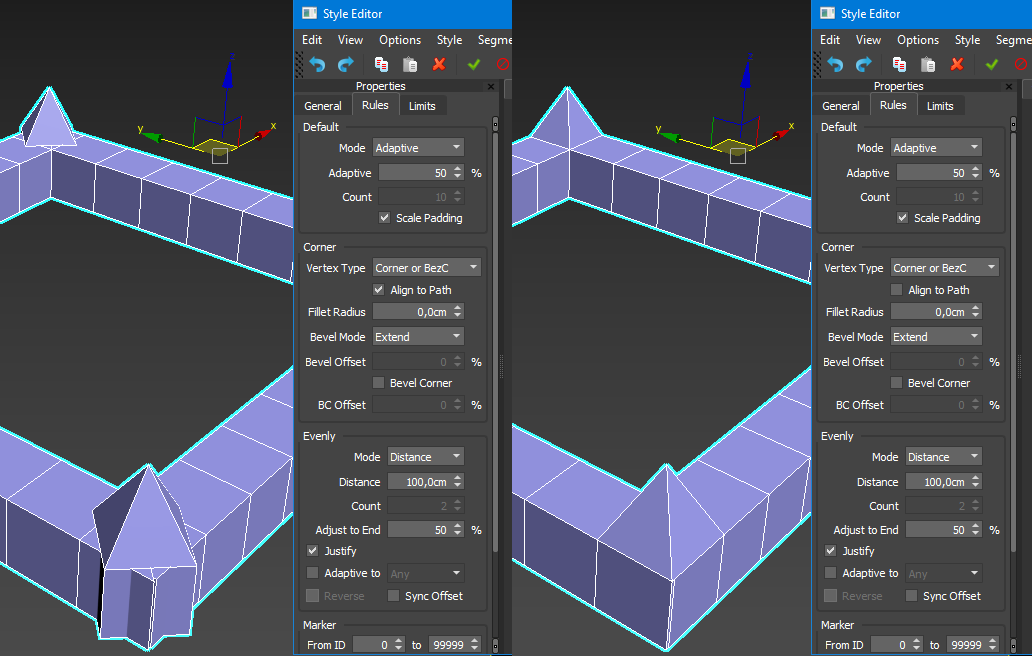
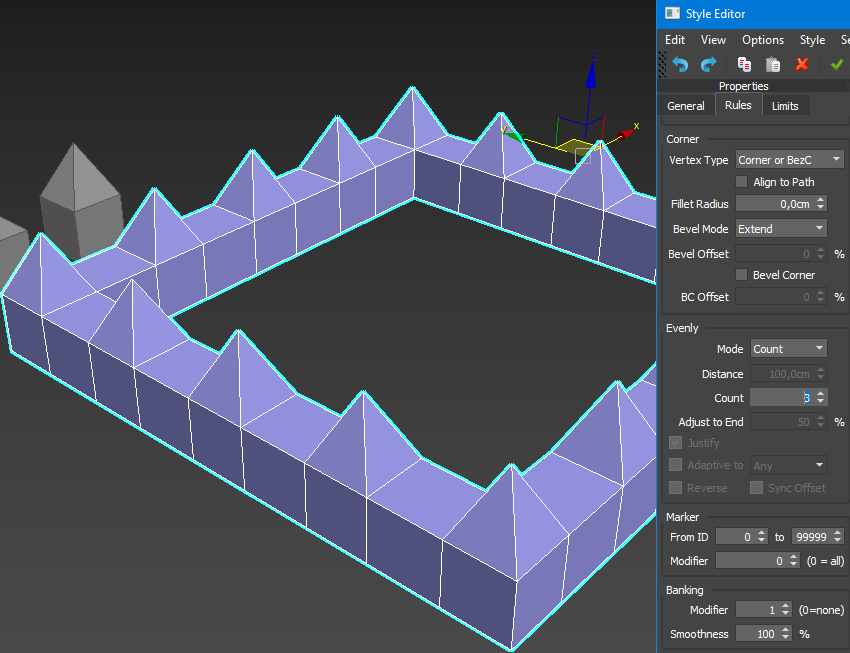
The next step is adding more modified boxes to the existing geometry so that they are distributed evenly on the sides. There’s just the option for that in the generator — Evenly. You don’t have to add a new segment; simply connect the existing modified box with the Evenly node by dragging the green circle. Depending on the size of your rectangle, nothing may seem to change in the viewport. Go to the Rules tab and scroll down to the Evenly section.
There are two modes for creating Evenly sections: distance and count. The former allows the distance between appearing segments to be chosen, while the latter takes the specified number of segments and puts them equidistantly on the spline. Try both modes; change the distance value to fit the scale of your boxes and the rectangle. The screenshot below shows the result of choosing Count mode with a Count value of three.
The remaining segment nodes in the generator — Start and End — are self-explanatory but won’t affect a rectangle (as it has no start or end). Marker is a new feature that lets you apply segments based on marker IDs and applied modifiers.
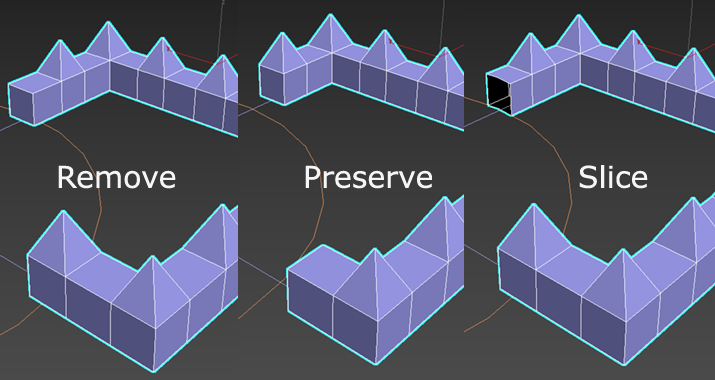
The Clipping Area node allows you to slice the new geometry using a spline. The clipping spline must intersect with the path spline. The rules for how this spline interacts with the rest of the RailClone object are set in the generator’s General tab. The For No-Slice option determines what happens at the edges of the clipping area. Remove creates the segment even if a part of it overlaps the clipping spline, Preserve has the opposite effect, and Slice simply cuts through the geometry, leaving a hole if the segment’s properties allow it.
Step 3: 2S Array Features
The other type of generator available in RailClone is 2S Array. It works as if several 1S arrays are stacked on top of each other. There are more nodes in the generator because everything now exists on two axes: X and Y. Because of this complexity, it is important to prepare segments thoughtfully. They must be created in the same plane as the empty RC icon. In the panoramic view, the X axis correlates with the length, and the Y axis with the height; the Z axis shows the width of the segment.
2S arrays require two splines: one is the horizontal path, and the other the vertical. This means you can create unusual shapes while keeping the geometry consistent and hole-free as much as possible. Of course, the best result is achieved if the segments align perfectly with the spline and the spline does not have acute angles.
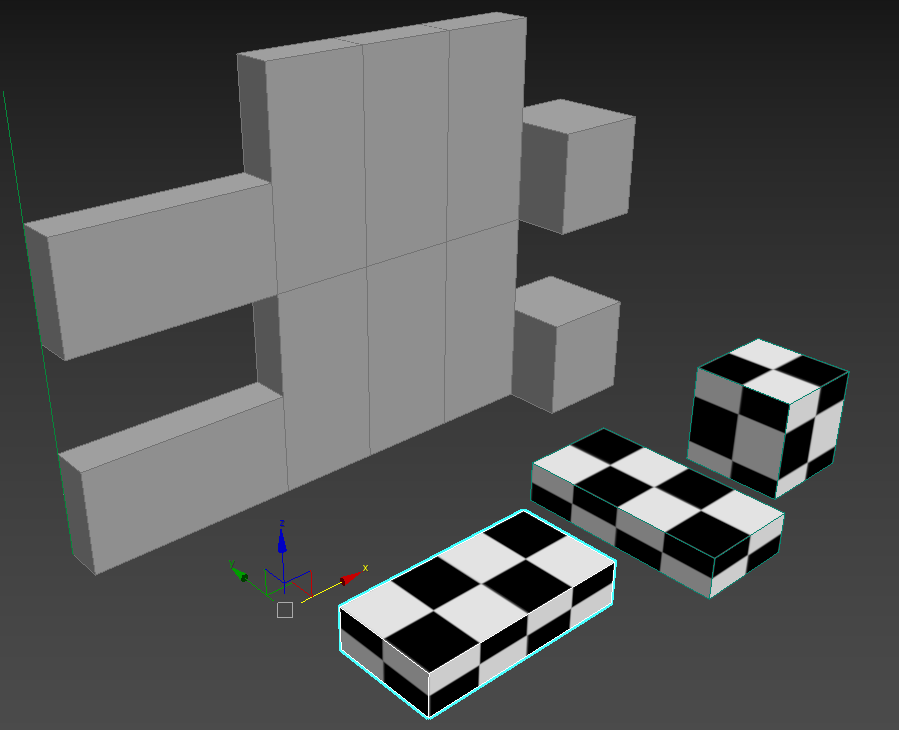
Apart from the aforementioned axes alignment, there is another rule for creating 2S arrays: the height of all the segments on the same level should be the same while the width can vary. In the example above, the segments share their Y size, while Z and X differ. Using these segments, RailClone creates solid geometry without holes. If we change the Y size of the pillar segment, the brick segments will not copy vertically to fill in the gaps. However, if we change the X size of the same block, the bricks’ position will adjust accordingly.
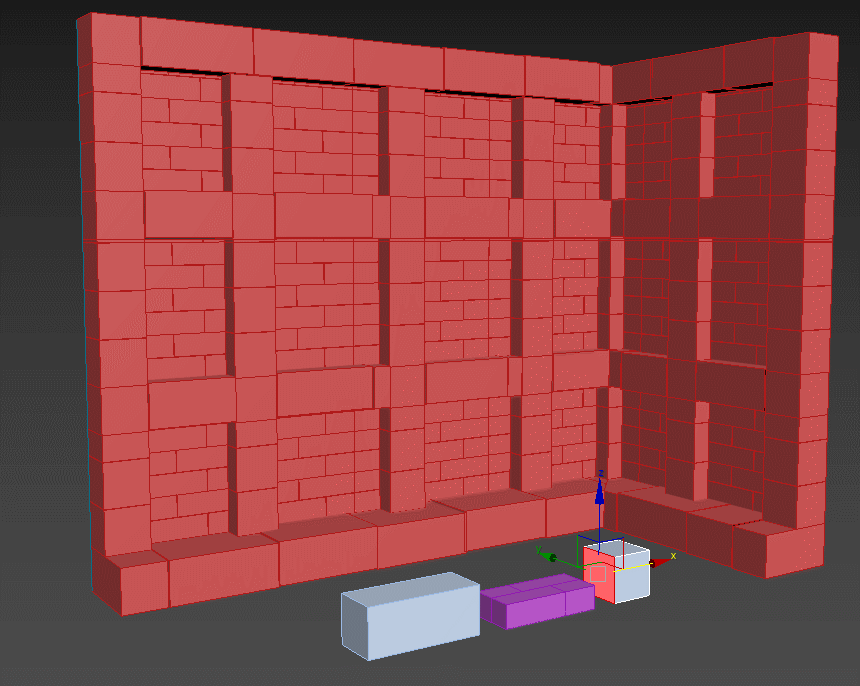
Let’s create this style from scratch. As in Step 2, we need to construct the splines and the segments in advance. This style uses only three segments, but you can create more for corners and edges, depending on your task. Once again, be sure to keep the Y dimension equal between the segments if you don’t want holes to appear.
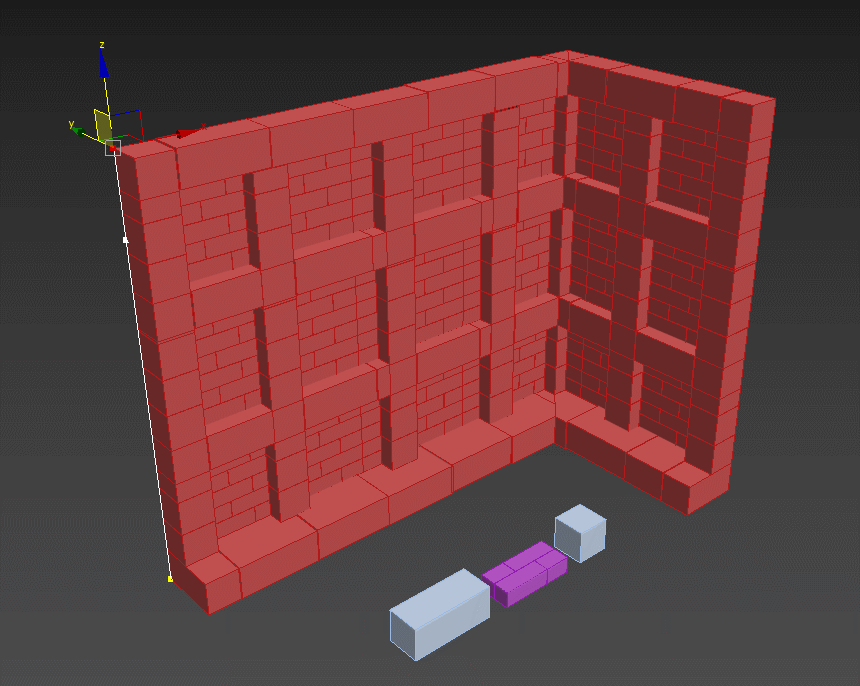
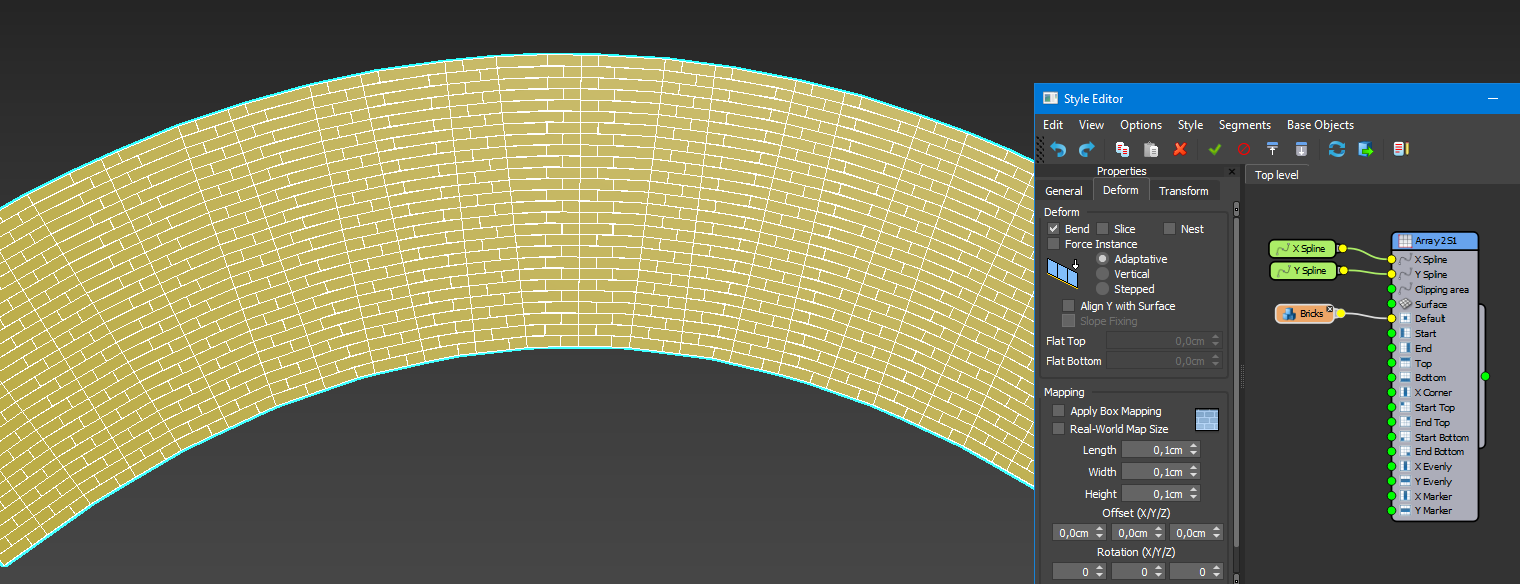
Create a RailClone object and open the Style Editor. Pick the Array 2S generator and create two spline nodes and a segment node for each segment. The spline that regulates the horizontal path goes into the X Spline slot, and the one that regulates verticality goes into the Y Spline slot. Connect the bricks segment to the default node to create a basic brick wall.
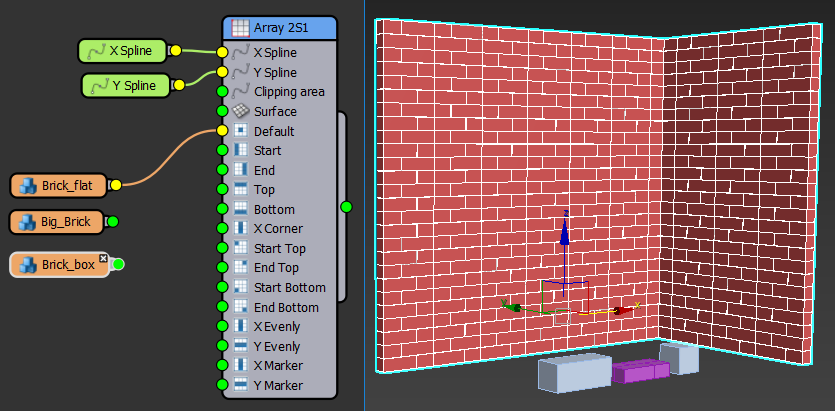
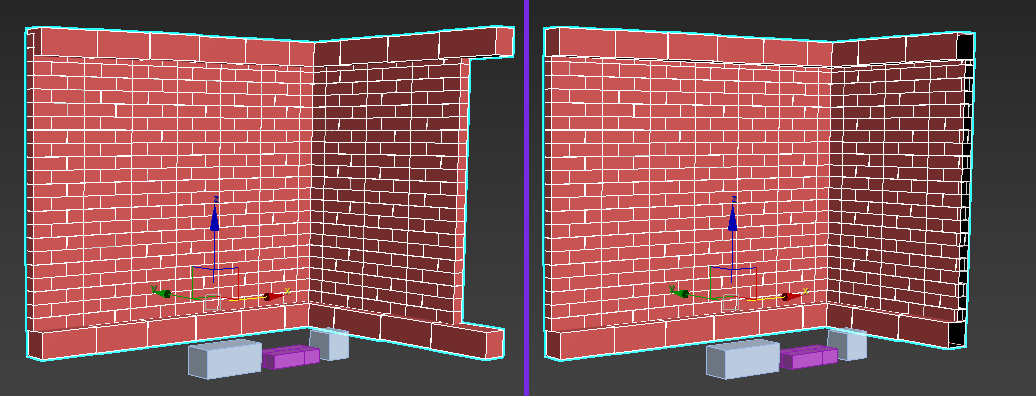
We want the wall’s top and bottom to have wide, thick bricks to represent the foundation and the border. Connect this segment to the Top and Bottom nodes. Depending on the length of your X spline, the big brick may extend too far from where the default ones end. As with the 1S generators, check the Slice checkbox in the Deform tab for all the segments. Not only does the end line become even, but you can also see that the top bricks no longer intersect with the default ones. Don’t worry about the holes where the geometry is sliced. We will fix this later with other nodes.
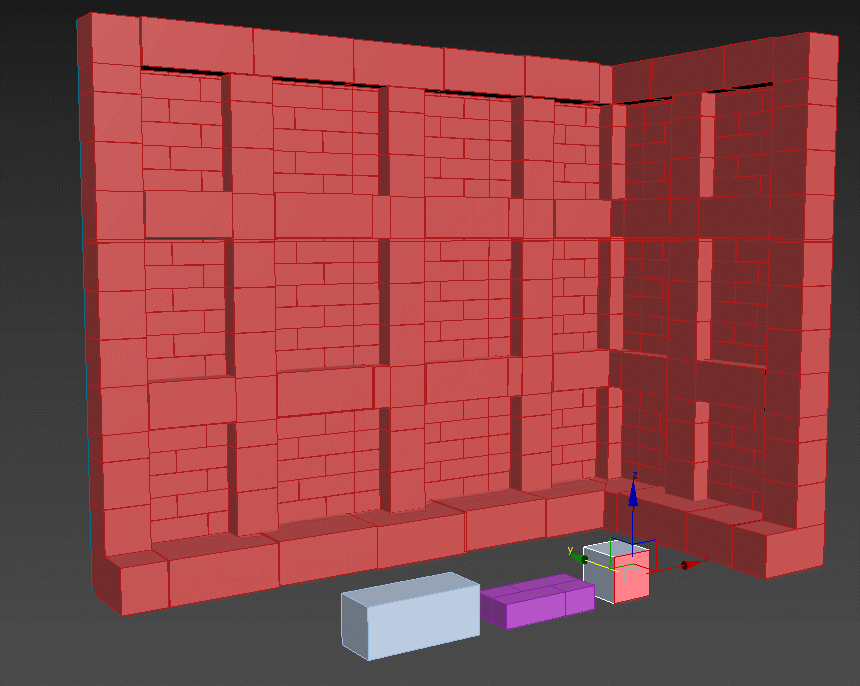
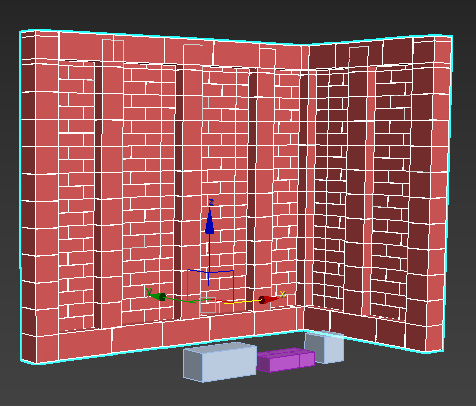
Finally, add small box bricks as Start, End, X Corner, and X Evenly to complete the basic style. There are no more gaps at the end of the wall because they are covered by the segments in the End slot.
Try creating segments for each node in the Array 2S generator and see how your style changes.
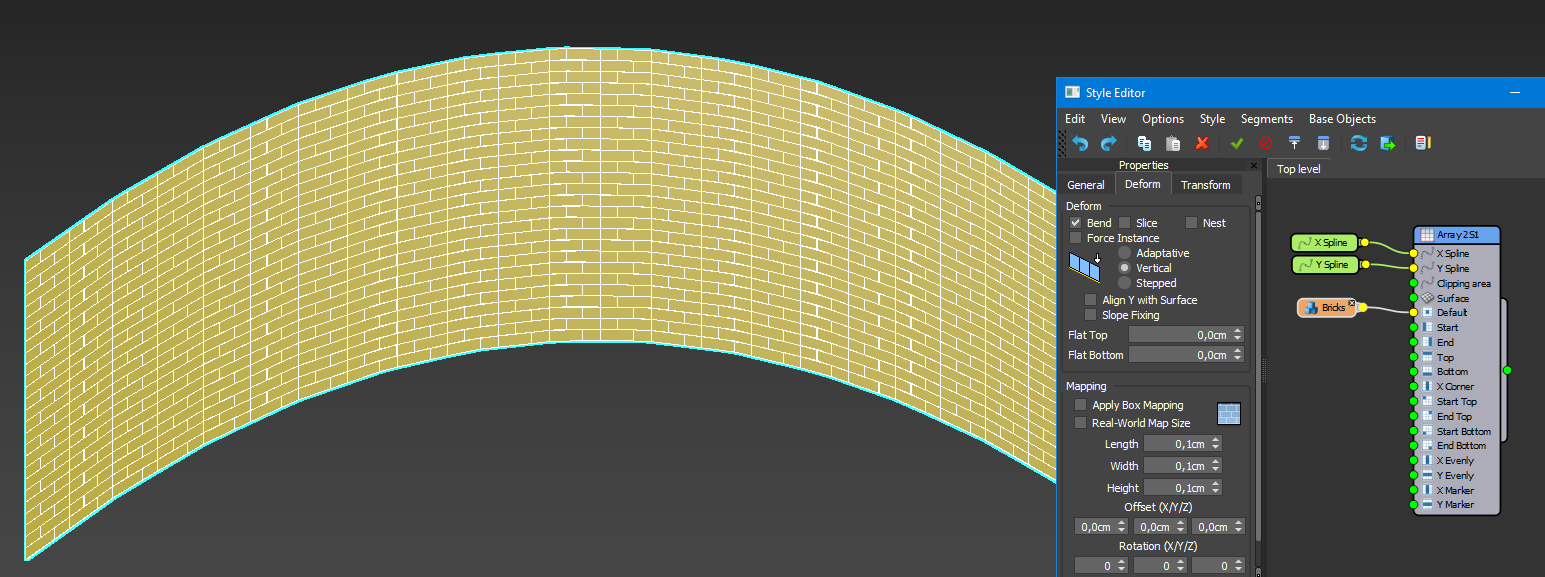
Step 4: Deformation and Overlapping
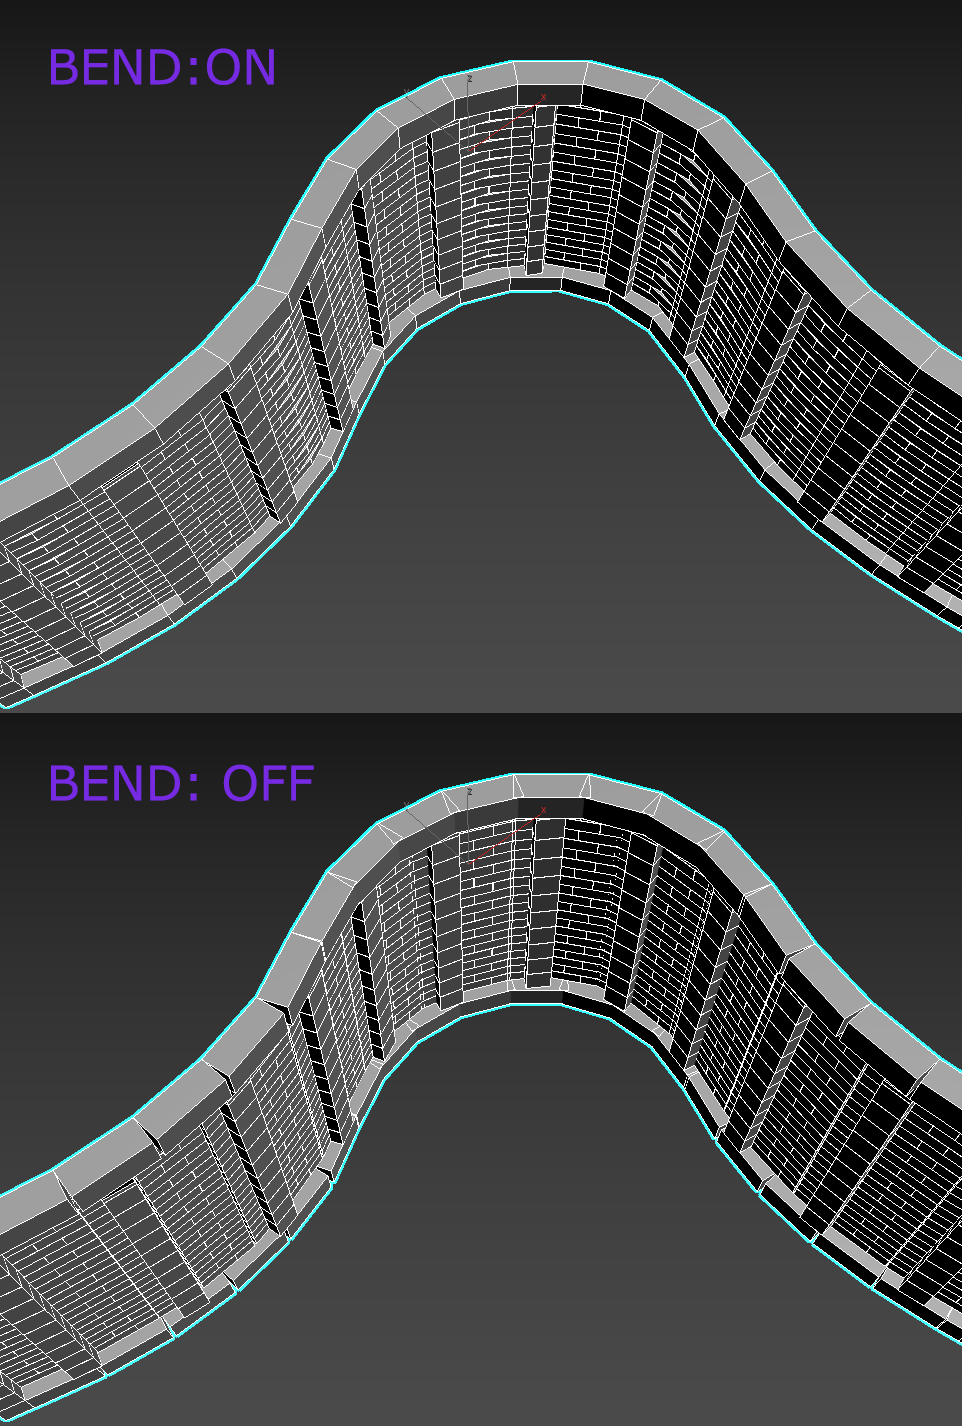
In our first styles, we used very simple splines and didn’t have to worry about smooth corners or changes in elevation. RailClone has expert tools for dealing with those. Using the same brick wall style, let’s change the spline to a complex curve. The way the segments behave on curves is controlled by the Deform tab in the segment’s properties. By default, Bend is turned on, meaning the segments will deform to correlate with the spline. However, brick walls don’t work like that in the real world: bricks are a certain size and don’t change shape. When Bend is turned off, the bricks will be positioned in a more realistic way: stepped and with gaps appearing in areas where the angle changes.
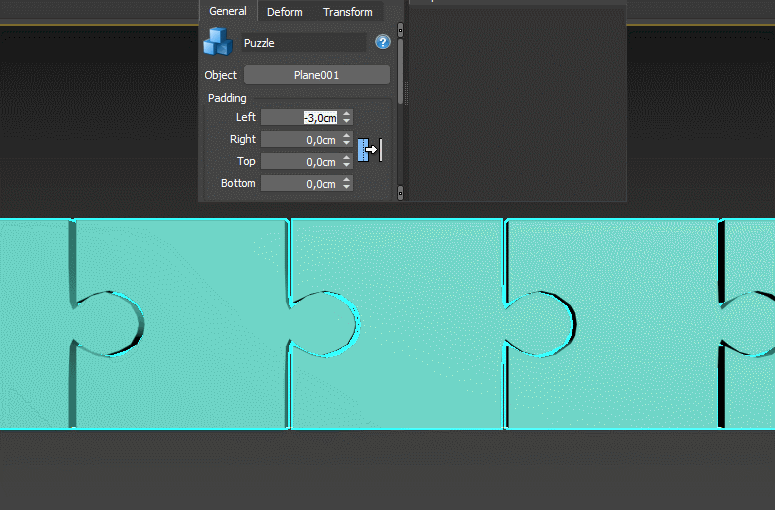
If you are using complex segments in your RailClone arrays, they may need to overlap to create an unbroken structure. In the following example, we have a jigsaw puzzle piece and want to make a line of them, all snapped together. By default, the pieces will be spaced far apart.
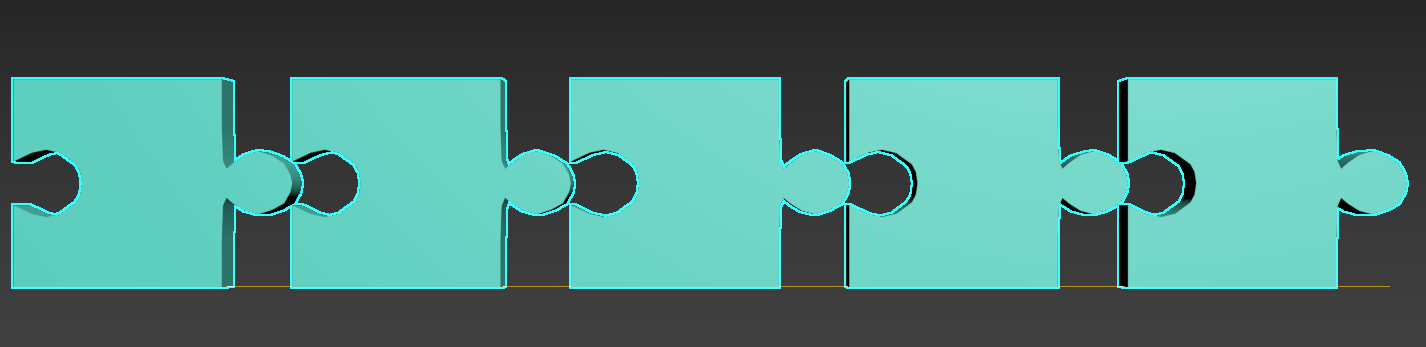
To move the segments closer together, use Padding in the segment’s properties. The value can be negative to bring the pieces closer together or positive to push them further apart. Padding can be used to create realistic spacing between objects; for example, gaps between bricks for mortar.
RailClone Pro also works well with elevation. If the X spline is not flat, you can choose between three main deform modes: Adaptive, Vertical, and Stepped. These modes can be accessed through the Deform tab of a segment.
In Adaptive mode, the Y spline remains perpendicular to the X spline through its whole length. All the segments will deform to follow the X spline.
In Vertical mode, the Y spline stays aligned with the Z axis of the world. The segments will deform to follow the X spline.
In Stepped mode, no deformation takes place. The Y spline is aligned with the Z axis of the world, while the segments follow the spline only at their pivot points. This mode is often used to create realistic objects for architectural visualization.

Additionally, the behavior of the segments in these modes can be changed with Flat Top and Flat Bottom parameters.
Conclusion: Lite and Pro
Using the techniques described above, you can create a wide range of composite objects, both simple and complex. Most of the examples in this article were created in RailClone Lite: a free version of the plugin with limitations. RailClone Pro is the full product and includes an extensive library of premade styles, so you don’t have to create them from scratch. A comparison of the two versions is available in the table below:
|
|
Lite |
Pro |
|
Amount |
1 generator per spline / 3 segments per generator |
Unlimited amount of generators and segments |
|
Splines |
Only flat splines |
Full verticality with 3 modes |
|
Style Library |
Limited amount of premade styles that can’t be customized |
Extensive style library that is fully customizable |
|
Editable Mesh |
Cannot be converted |
Can be converted |
|
RailClone Tools |
- |
+ |
If you plan to create complex architecture, city blocks, or objects with many unique elements, RailClone Pro is a must-have. However, if you intend to use it mostly to make fences or simple arrays, RailClone Lite is a more than viable option.
At Megarender cloud render farm, we support RailClone 5 and update it on all computers the moment a new build is released. The other available plugins include Forest Pack, FloorGenerator, Phoenix FD, Anima, and more. Don’t forget to use our plugin to collect RailClone objects correctly and ensure they are rendered accurately. If you have any questions about rendering your 3DS MAX project, contact us in the tech support chat.


