There are over a dozen professional 3D modeling applications on the market, and sometimes it feels daunting to choose between them. Start with picking the industry you want to use this software for and go from there. For example, Houdini is an excellent tool for VFX and realistic simulations and Rhinoceros is the top solution for NURBS modeling. But there are big powerhouses that can do almost any 3D task, like 3DS MAX and Maya. While similar, their toolsets cater to slightly different tasks and can be more or less optimized for specific industries. Let’s look at the core differences and decide if you should use 3DS MAX or Maya for game modeling.
Modeling Workflow
Creating and changing geometry in 3DS MAX is based on modifiers. There is a big universal modifier, Edit Poly. With Edit Poly, you can access and create vertices, edges, and faces and change their positions and properties. Extrusions, insets, and bevels are all done through Edit Poly. Other modifiers can be placed on top to affect the whole object or a selected part of an object: Bend, Relax, Chamfer, etc. Finally, more functions are available in the ribbon’s Modeling tab. Here you can find Swift Loop and Loop Tools that are invaluable in modeling but, for some reason, are not mapped to any key combinations by default. All in all, 3DS MAX offers excellent tools for both organic and solid surface modeling, though you’ll have to look for them in different locations and map some buttons for easy access.
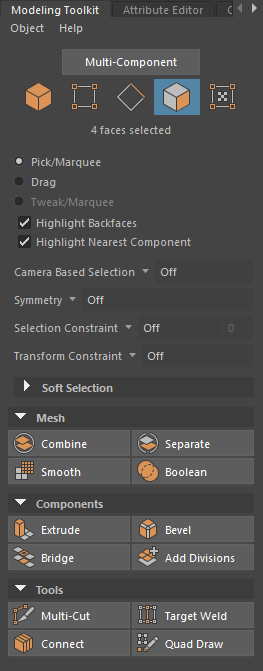
In Maya, you can access any polygonal object’s vertices, edges, and faces through the Modeling Toolkit right after creating it. Primary functions are made into buttons, like Extrude, Bevel, and Connect. Also there is access to mesh refinement and boolean operations (these are only available as modifiers in 3DS MAX). Users can find more functions in Mesh, Edit Mesh, and Mesh Tools menus, many of which are present on the shelf. Like other basic modeling tools, creating a loop or moving a pivot is bound to keys by default. This way, Maya prioritizes using keyboard shortcuts for a faster and more efficient workflow.
|
Maya Modeling Toolkit offers excellent tools for low- and high-poly modeling marked by easy to understand icons |
Retopology and optimizing polycount are very similar in both applications. The tools to reduce the number of polygons in the scene (Reduce/Optimize) offer a wide array of settings for almost any situation and keep the object’s shape pretty well. You can also use displacement and normal maps to transfer geometry from a high-poly to a low-poly object. Retopology tools are available in Maya Modeling Toolkit (Quad Draw) or in Freeform tab in the ribbon (Poly Draw) in 3DS MAX.
Outside of workflow, both 3DS MAX and Maya offer similar tools. 3DS MAX can do anything made in Maya and vice versa. Maya provides easier access to the history of operations thanks to the node structure; 3DS MAX can achieve the same by building a stack of modifiers, one for each edit.
UV mapping
Any 3D model is worthless without proper UVs; therefore a professional modeler must include them with their creations. 3DS MAX and Maya offer almost identical toolkits for this but they focus on slightly different aspects.
3DS MAX makes it faster to unwrap the UV maps: marking seams, choosing different algorithms, and so on. Maya has excellent tools for projecting and makes them more prominent in the menus. Instead of marking seams, choose parts of the mesh and the projection type to create a map of a selected region. Other than that, cut, stitch, align, and layout tools are identical.
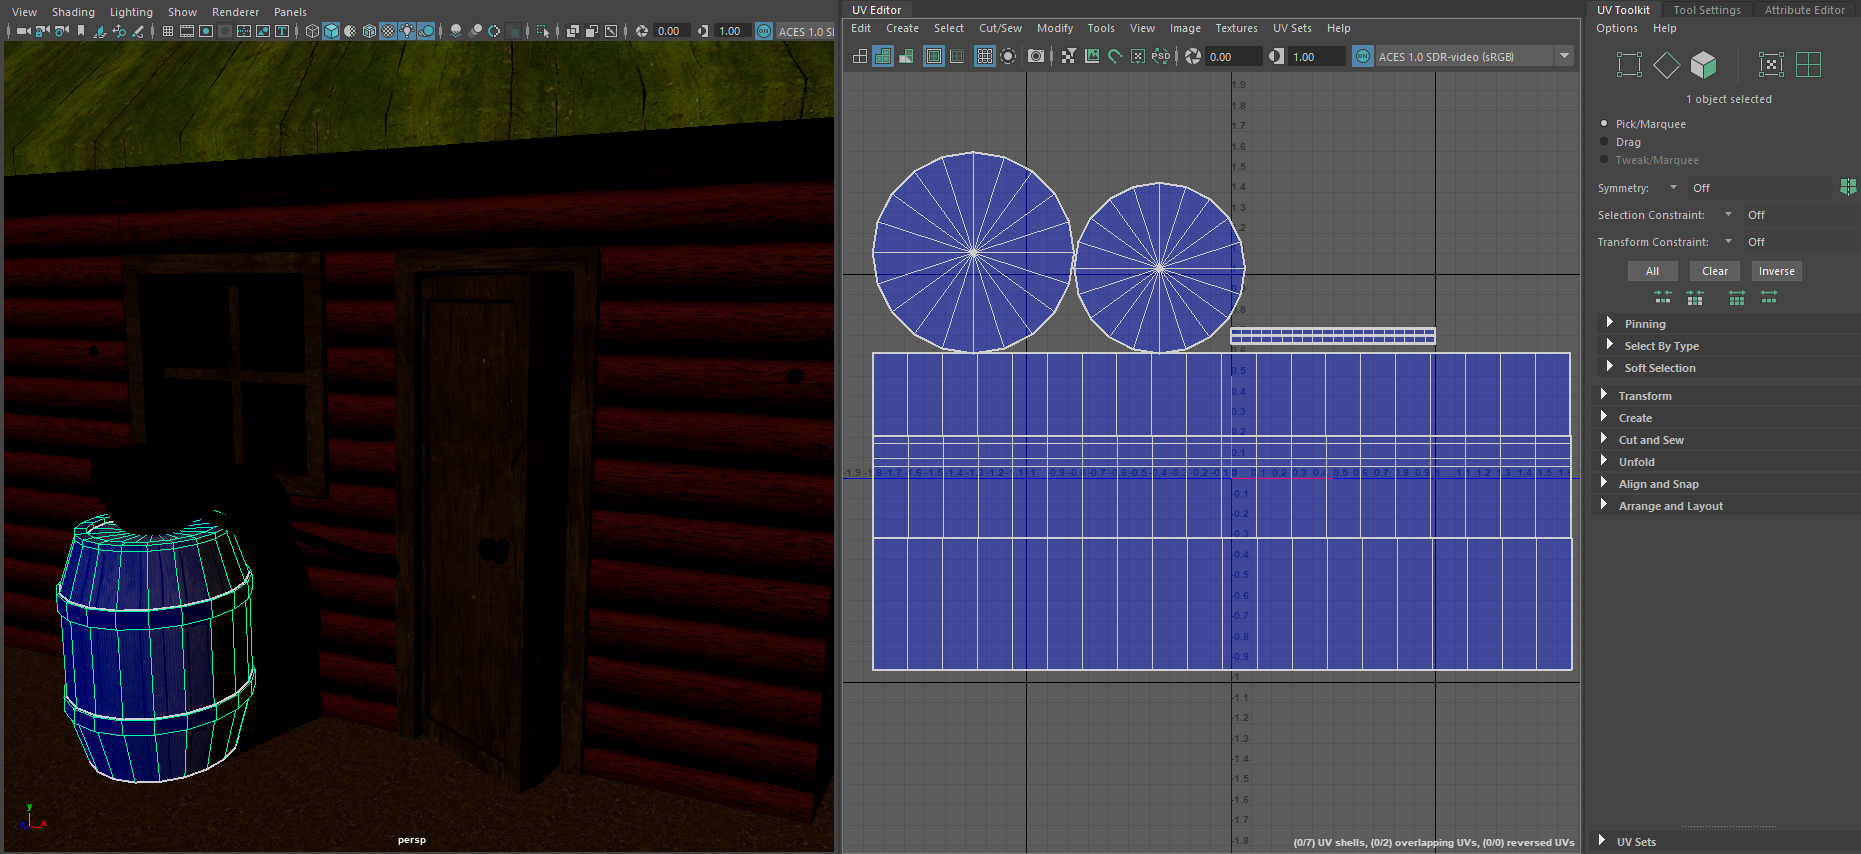
Maya’s structure offers an additional usability boost: a specialized UV Mapping workspace. It places the 3D viewport and UV Editor next to each other and removes all unnecessary toolbars. At any moment, you can choose to go back to different workspaces without rearranging the windows and toolbars manually.
|
|
Maya UV Editing workspace conveniently puts the viewport, UV Editor, and UV toolkit next to each other |
Rigging
So far, 3DS MAX and Maya have been offering very similar tools for modeling and UV mapping, so creating stationary assets for games can be quickly done using either of them in an equivalent amount of time. But an essential part of gamedev is making moving characters or mechanisms and rigging them for animation. Here Maya starts to show its superiority.
3DS MAX has a decent toolset for creating skeletons and several modifiers to create and adjust the character’s skin. Most of the actions like mirroring or renaming are done through the same tools used for modeling. Therefore, they are scattered all over the various menus and take time to find and adjust. A new CATrig system is designed to simplify and fasten the rigging process in 3DS MAX, but as with any new tool, it has not been refined yet.
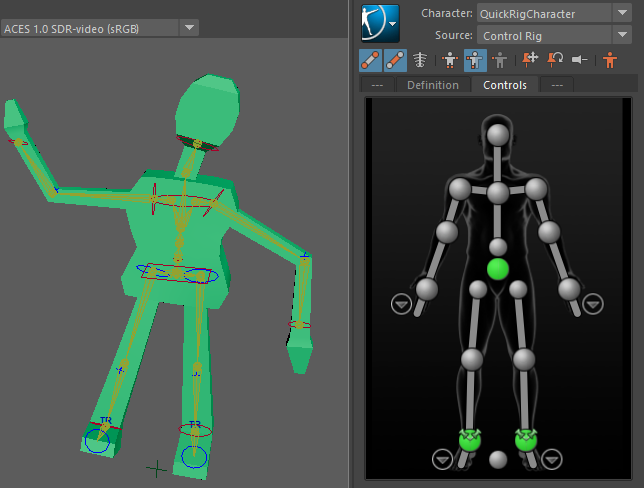
Maya once again offers a unique workspace specifically for rigging the characters. You can create the skeleton manually, but the best performance boost comes from the HumanIK module. This way, you can create a skeleton in an automatic or semi-automatic way without placing each bone. When manually creating skeletons, Maya helpfully centers the bones inside existing geometry when manually creating skeletons, mirrors them with easy renaming, and provides an intuitive skin weighting system. You can find Maya rigging tutorials from their
official YouTube channel and many other industry professionals.
|
|
HumanIK automatically creates a skeleton and skin for a bipedal model and requires only minor adjustments |
Export to game engines
3DS MAX allows exporting scenes or selected geometry into a variety of formats. If you know the required extension, save your file using the “Save As” or “Export” menus. Maya does pretty much the same but has special separate menus for Export to Unity and Unreal Engine. It simply saves the scene or geometry in a required file format to the chosen project folder, but it is a nice touch nevertheless.
3DS MAX works best when it comes to creating architecture and landscaping. There are many third-party plugins for creating procedural buildings or generating trees and stones. But the gamedev industry has made its choice: Maya is considered the standard and is used in most big and small studios. It offers an excellent workflow for modeling, UV mapping, rigging, and animating, with the ability to share one project among several people. So if you are choosing between 3DS MAX or Maya for game modeling, choose Maya and you won’t go wrong.
At our Maya render farm, we offer accelerated rendering of scenes done in Maya with Arnold. If you need a different CPU render engine for your project, contact our tech support or email us at info@megarender.com. We’ll get back to you in 24 hours with a solution!


